

To provide your visitors with the best experience on the site, you should make the elements clickable — for example, buttons, navigation menu, social icons, phone numbers, etc. For that, you should link them accordingly.
Adding links to the elements
There are lots of different elements available in our gallery. As for now, you have a possibility to set a click action for the text, buttons, images, and icons on your site.
Tip: check the article Actions of a contact form when it is submitted to see how you can redirect the users after they submit the contact form on your site.
Adding links to the text
1- Firstly, to make the text clickable, select it, and click on the "chain" icon in the pop-up menu:

2- After that, click on the "gear" near the opened field and access the settings:

3- In the new window select the needed click action from the drop-down menu:
Adding links to the button
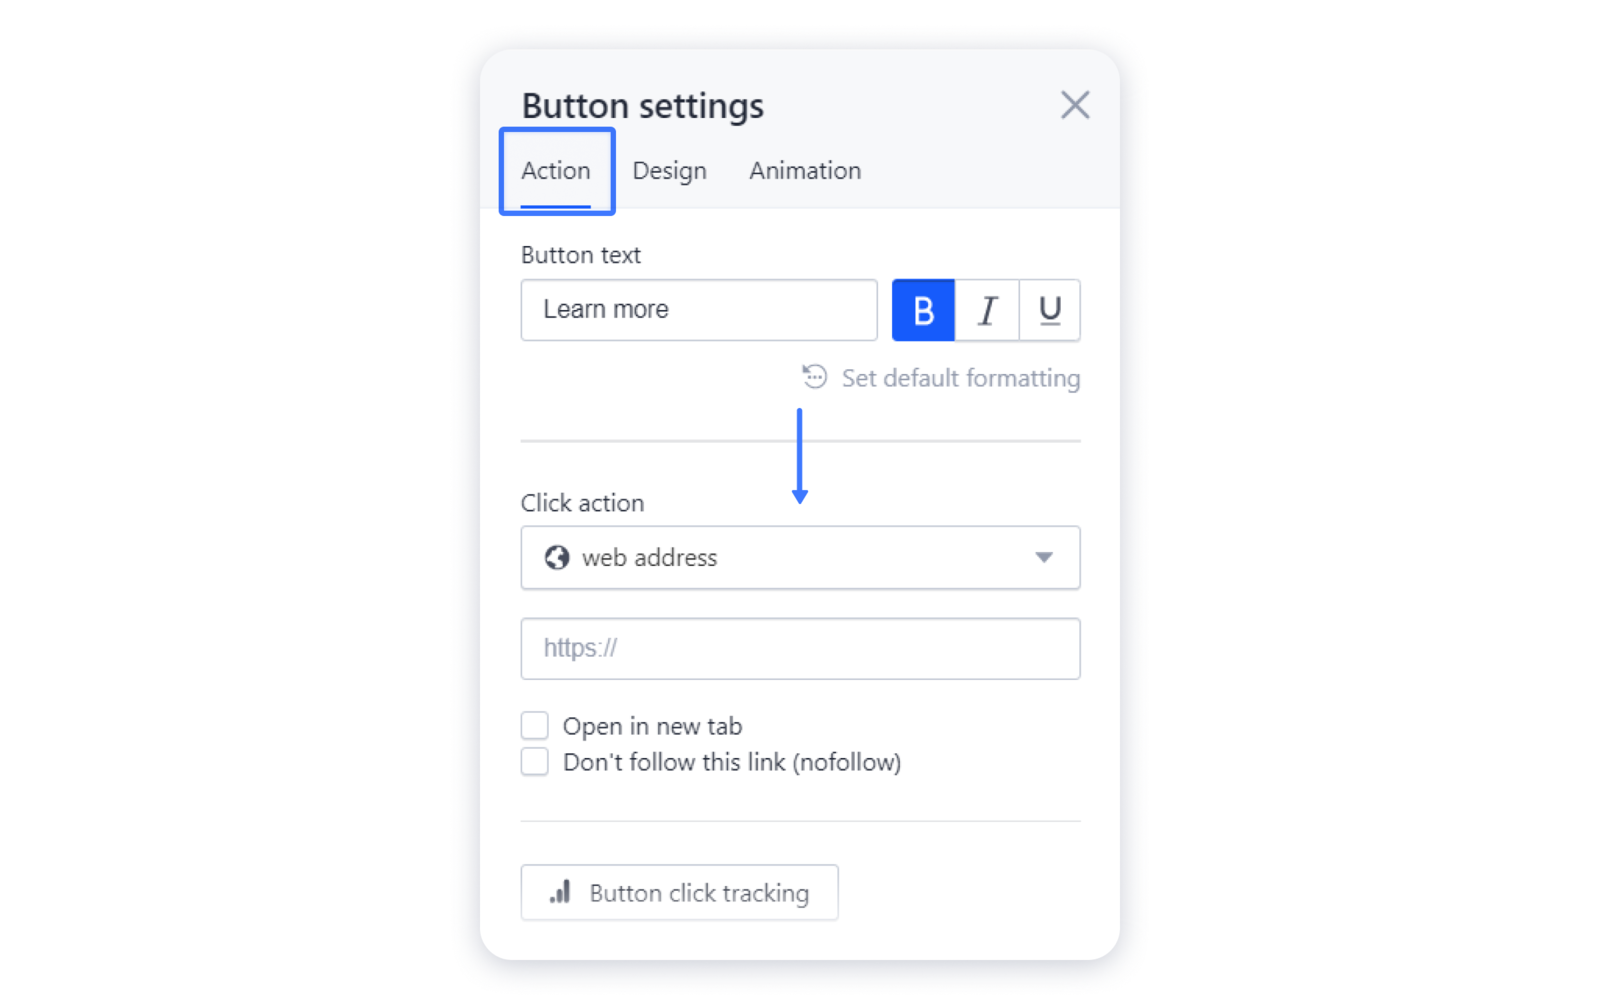
1- For that, click on the button itself and navigate to its settings by clicking on the "gear" in the pop-up:
2- In the new window navigate to the Action tab and select the needed click action from the drop-down menu:
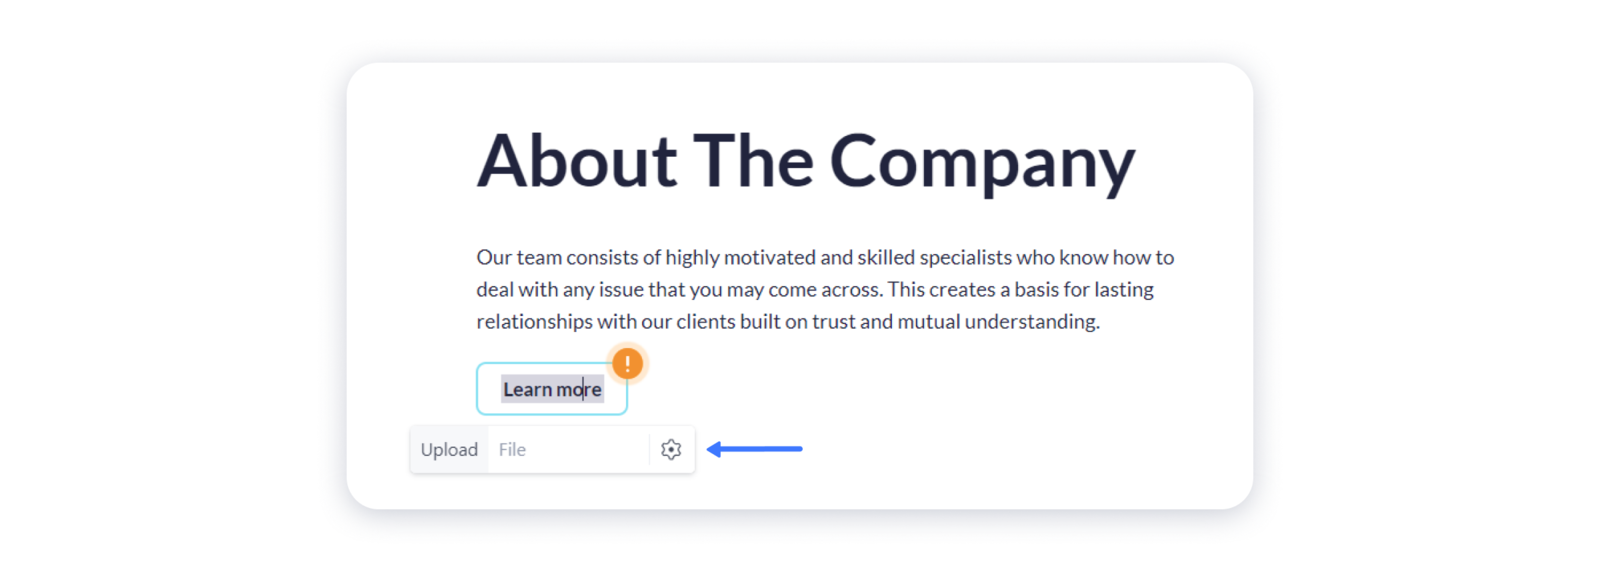
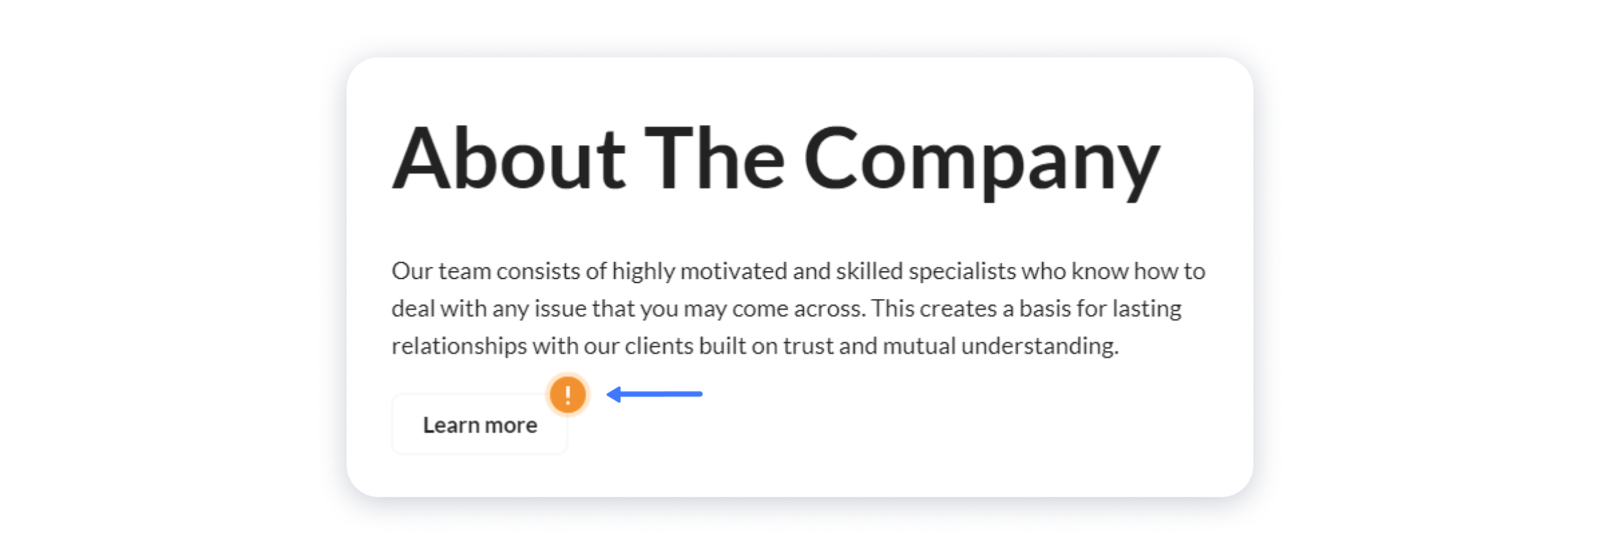
Note: if the link isn't added to the button, you will see the exclamation mark near it in your editor:
Adding links to the image
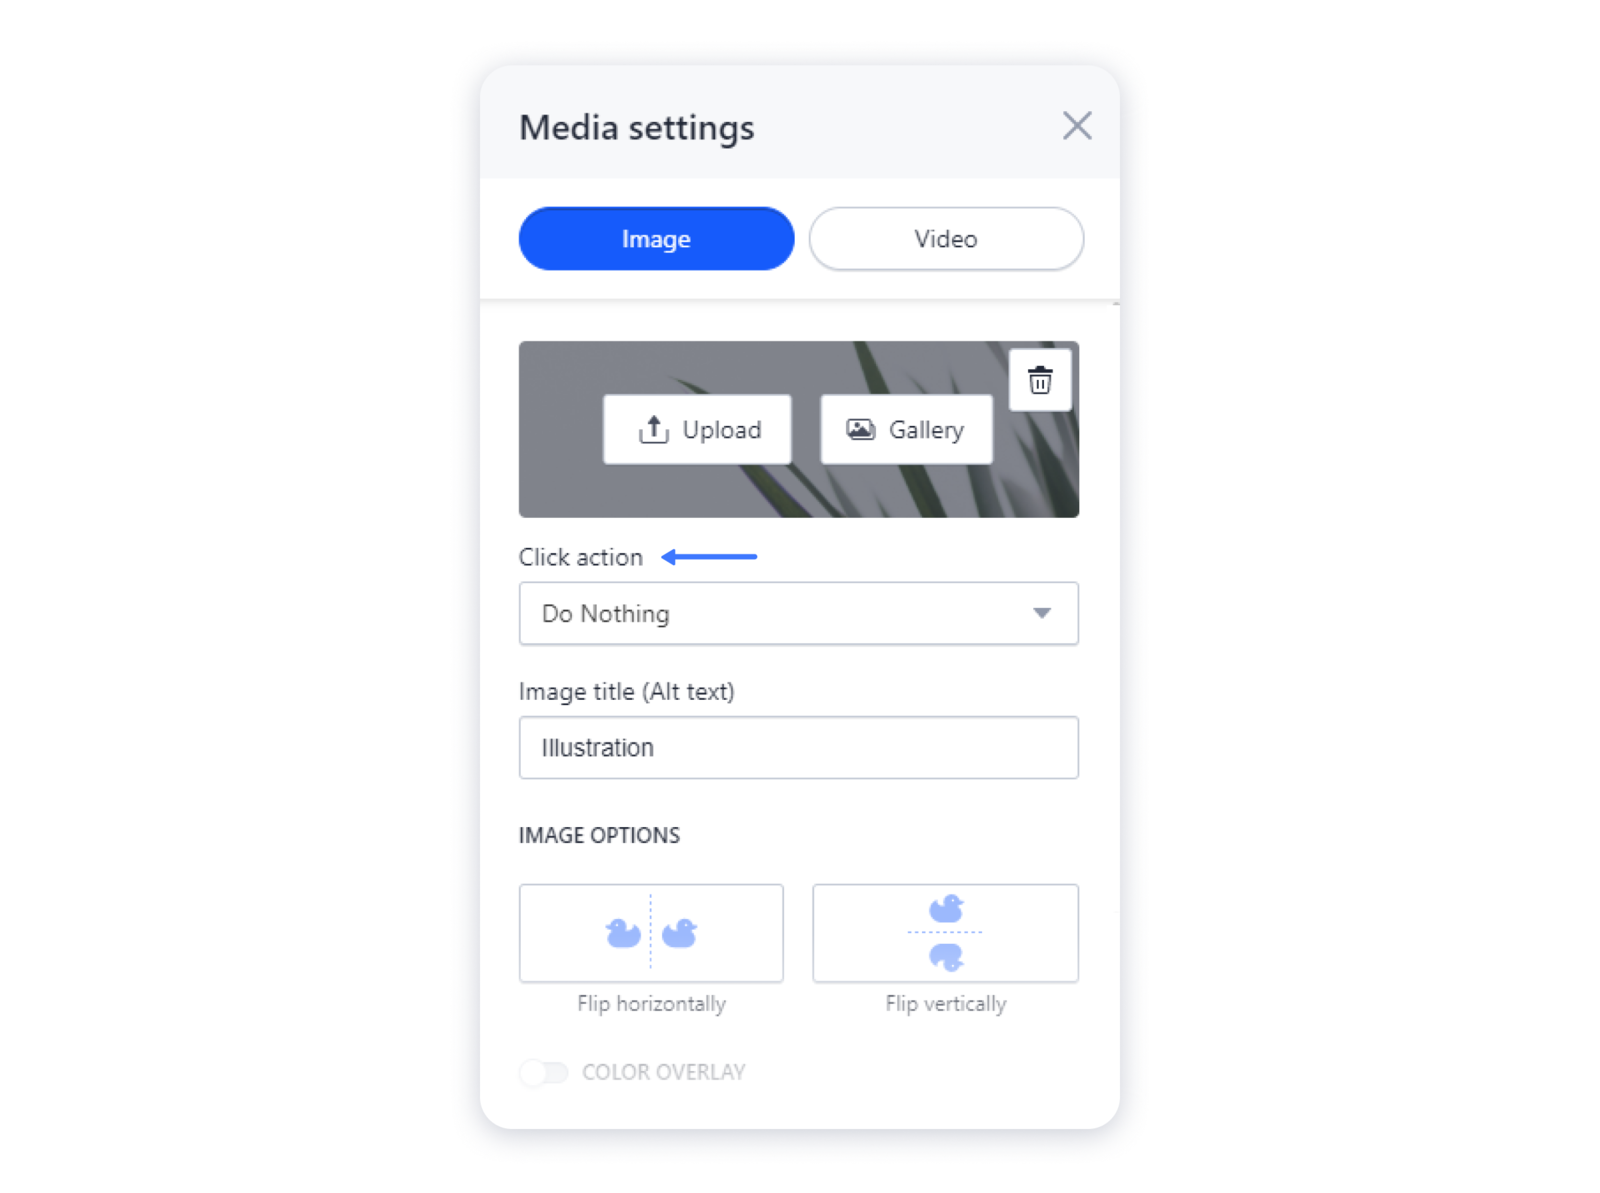
1- For that, click on the image itself and access its setting by clicking on the "gear" in the pop-up:
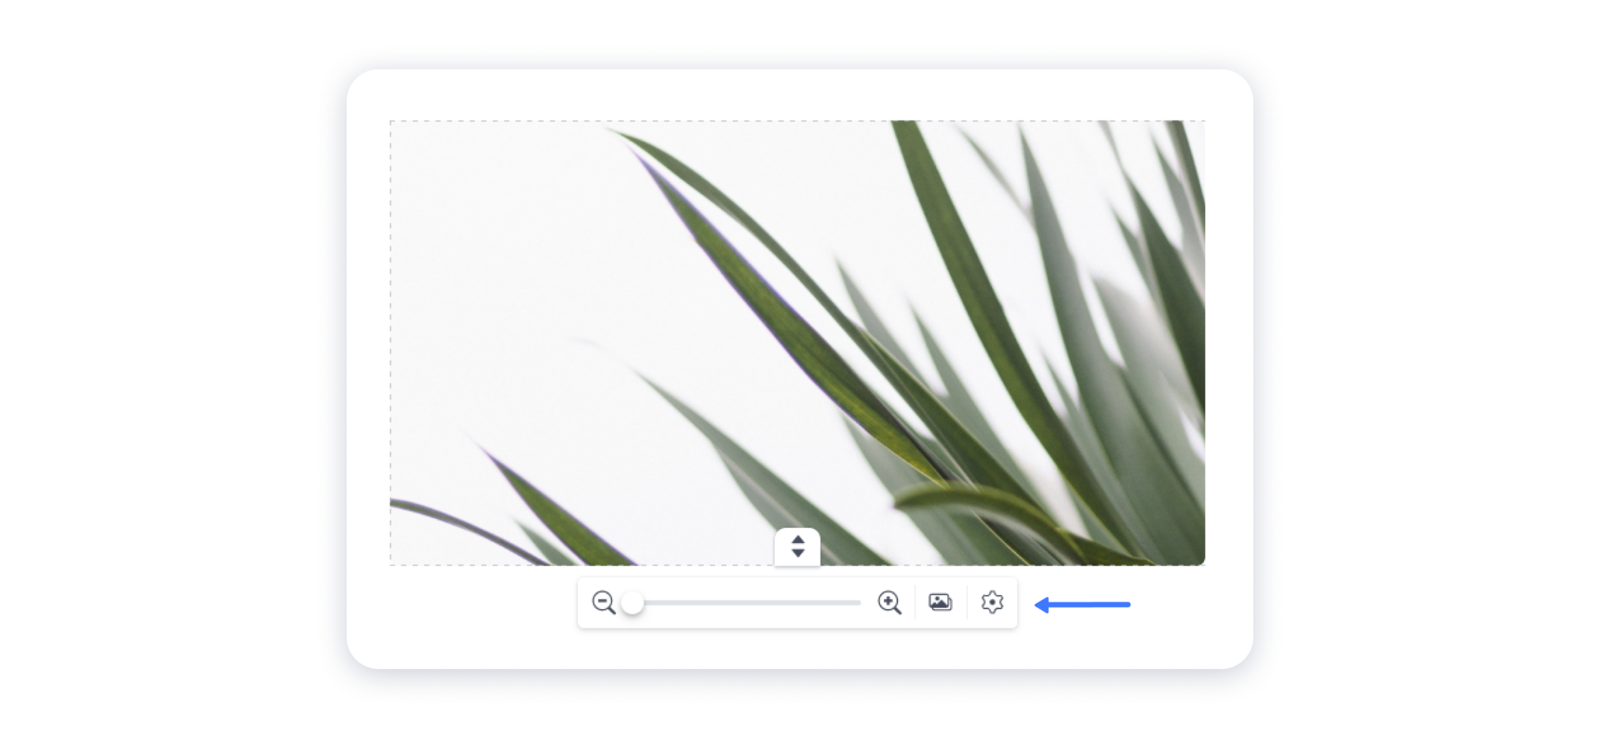
2- In the new window select the needed click action from the drop-down menu:
Note: links can't be added to the background images of your site.
Adding links to the icon
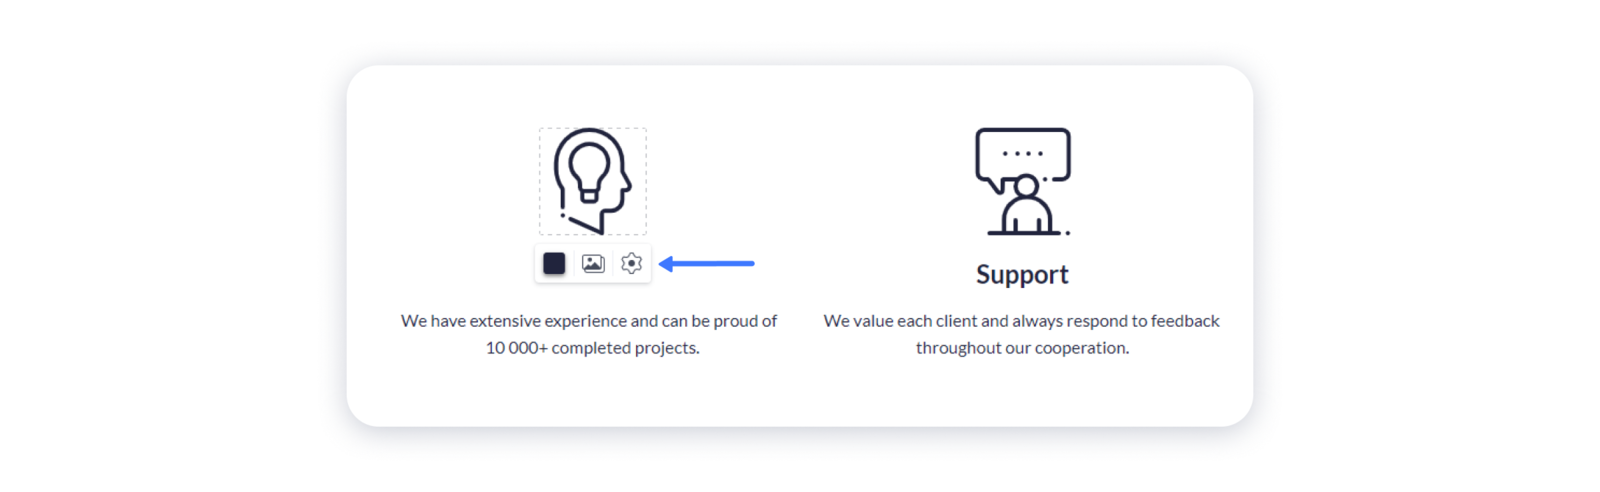
1- For that, click on the icon itself and access its setting by clicking on the "gear" in the pop-up:
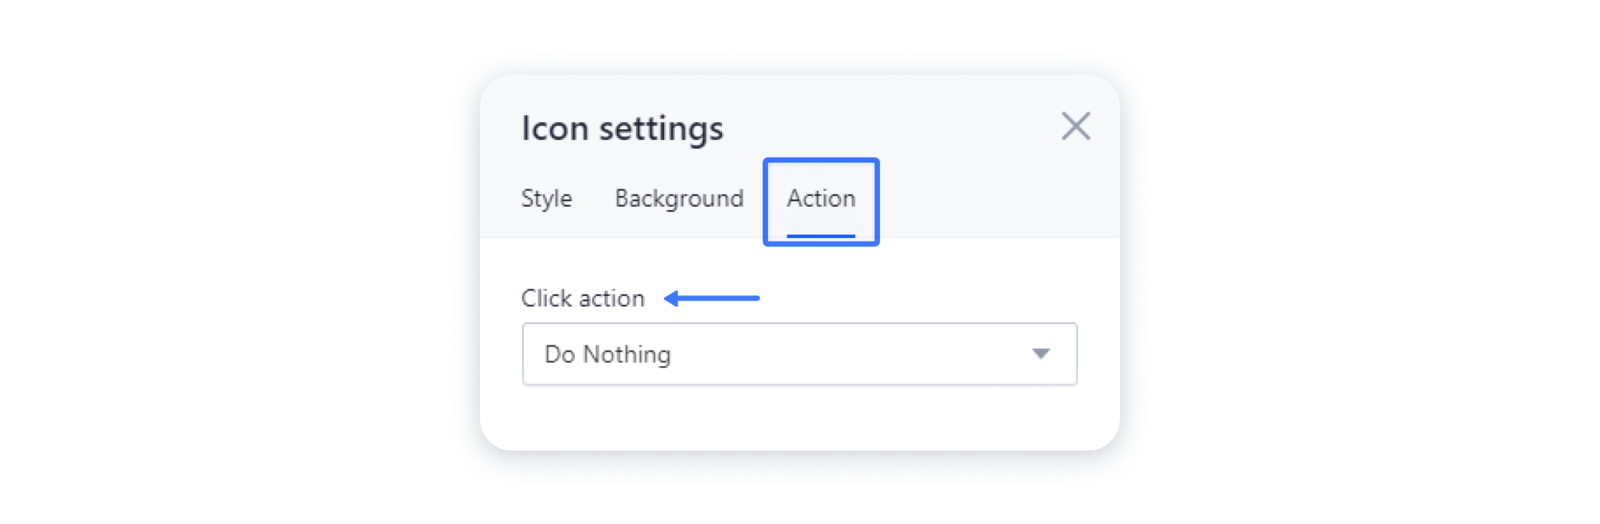
2- In the new window navigate to the Action tab and select the needed click action from the drop-down menu:
Possible click actions
After you open the item settings, go ahead, and choose the suitable click action from the drop-down menu. Learn the possible features and their functionality in the paragraph below.
Scroll to block
1- This feature redirects users to the block on the same page of your site. For that, choose the Scroll to block option in the dropdown and then select the needed block:
2- You can also select the block visually on the site by clicking on the "target" icon:

Tip: check the article Changing the design of a block to set up the unique block's anchor name for easier differentiation.
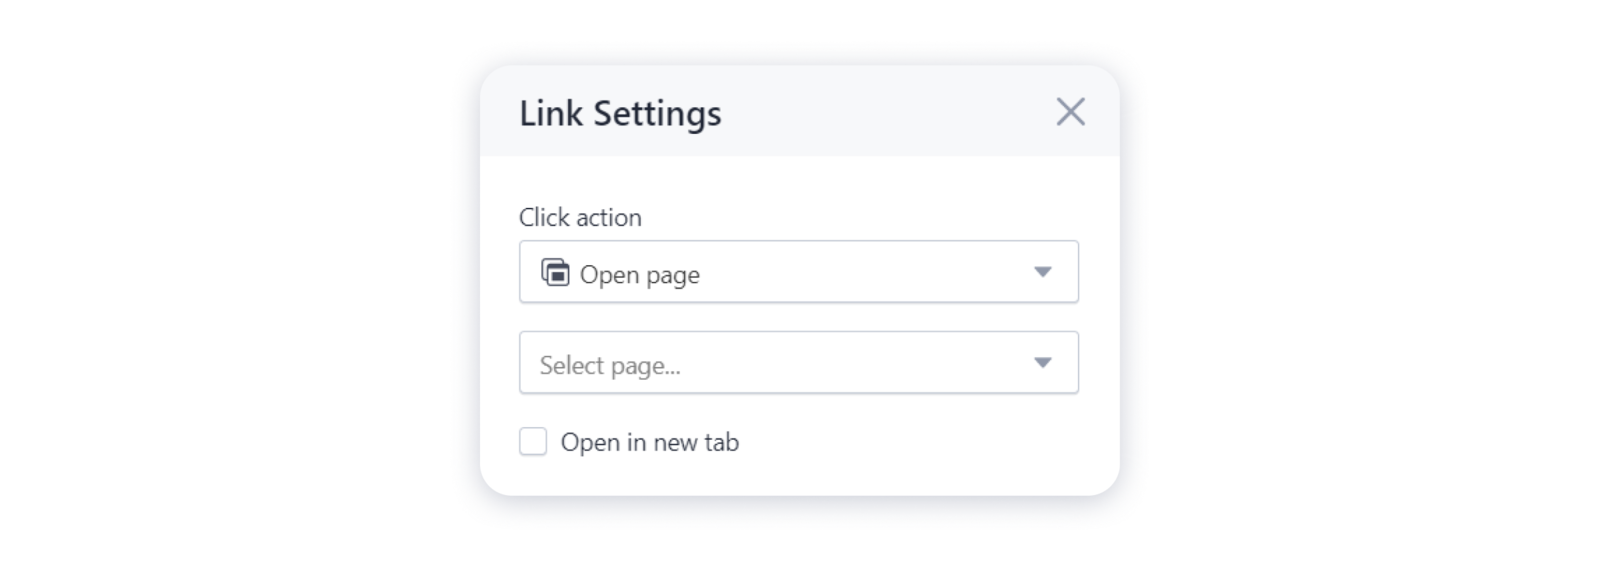
Open page
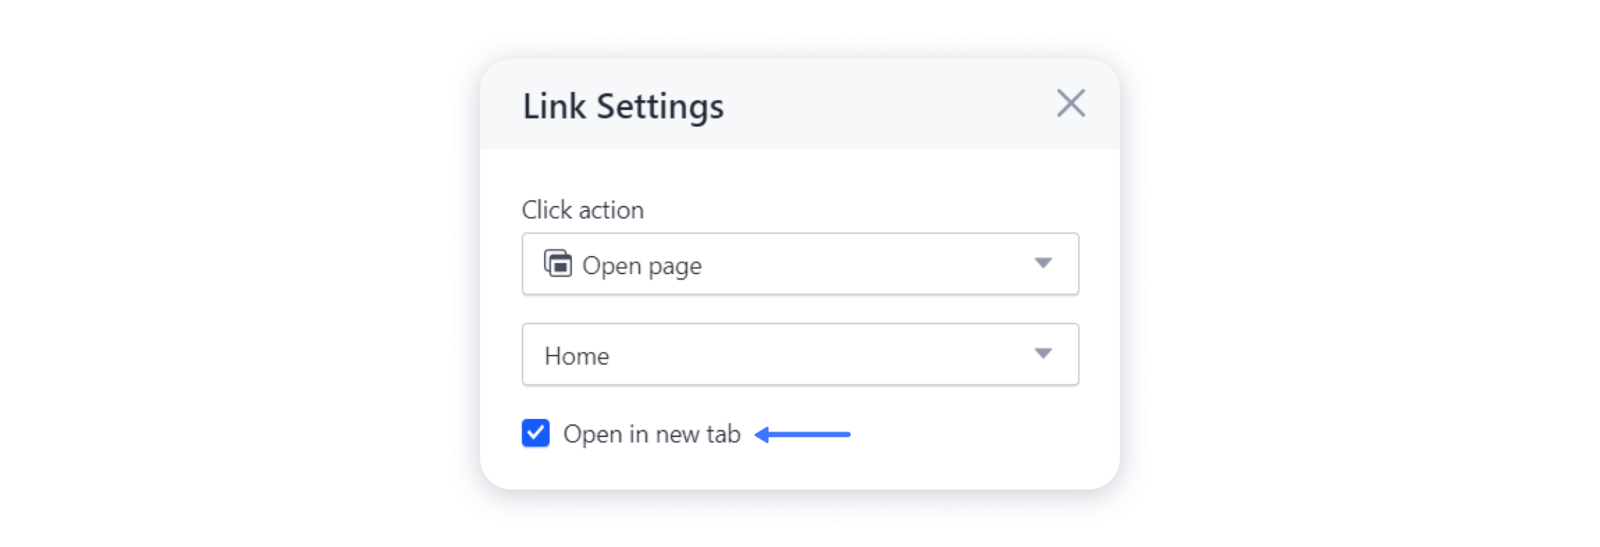
1- This feature allows you to redirect the visitors to another page of your site once they click on the element. For that, choose Open page in the dropdown and then select the needed page:
2- You can also toggle on the option of opening the page in the new browser tab:
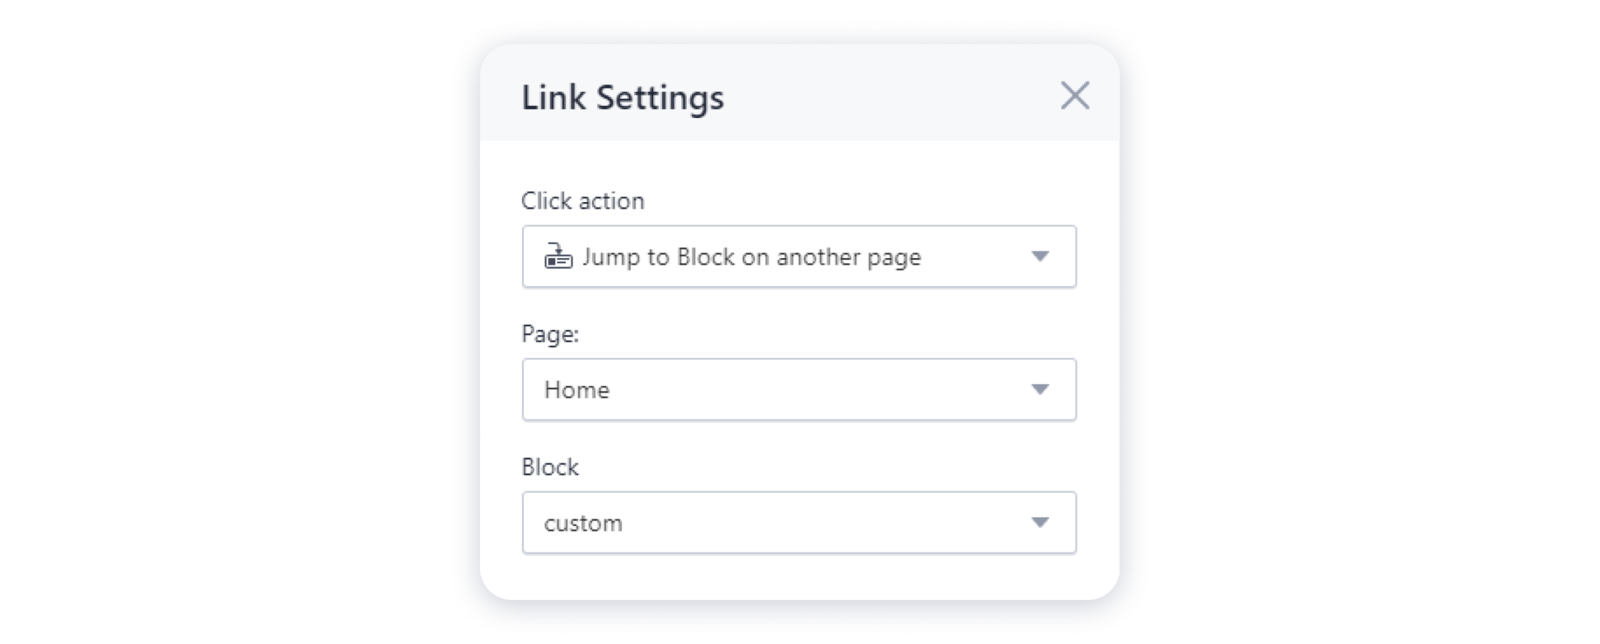
1- This option links the element to the particular block on another page of your site. For that, choose Jump to block on another page, then select the page and specify the name of the block:
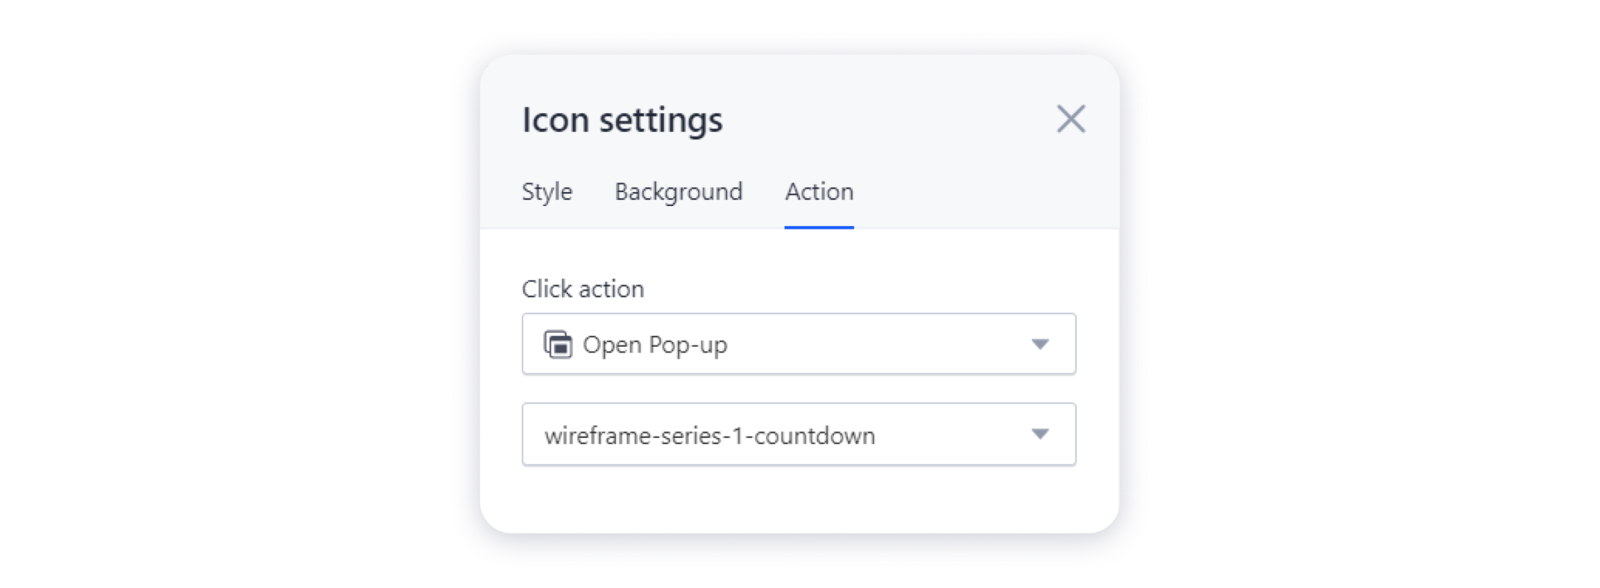
Open Pop-up
1- This action allows you to open a pop-up window on your site when the visitors click on a particular element. For that, choose the Open Pop-up option in the Click action field and select the needed window:
Important: this option is available for Pro sites only. Also, there's no possibility to add a link to the pop-up in the text element settings yet.
Close Pop-up
1- This option closes the current pop-up after clicking on the particular element — it is commonly used for the buttons. For that, choose the Close Pop-up action in the elements settings:

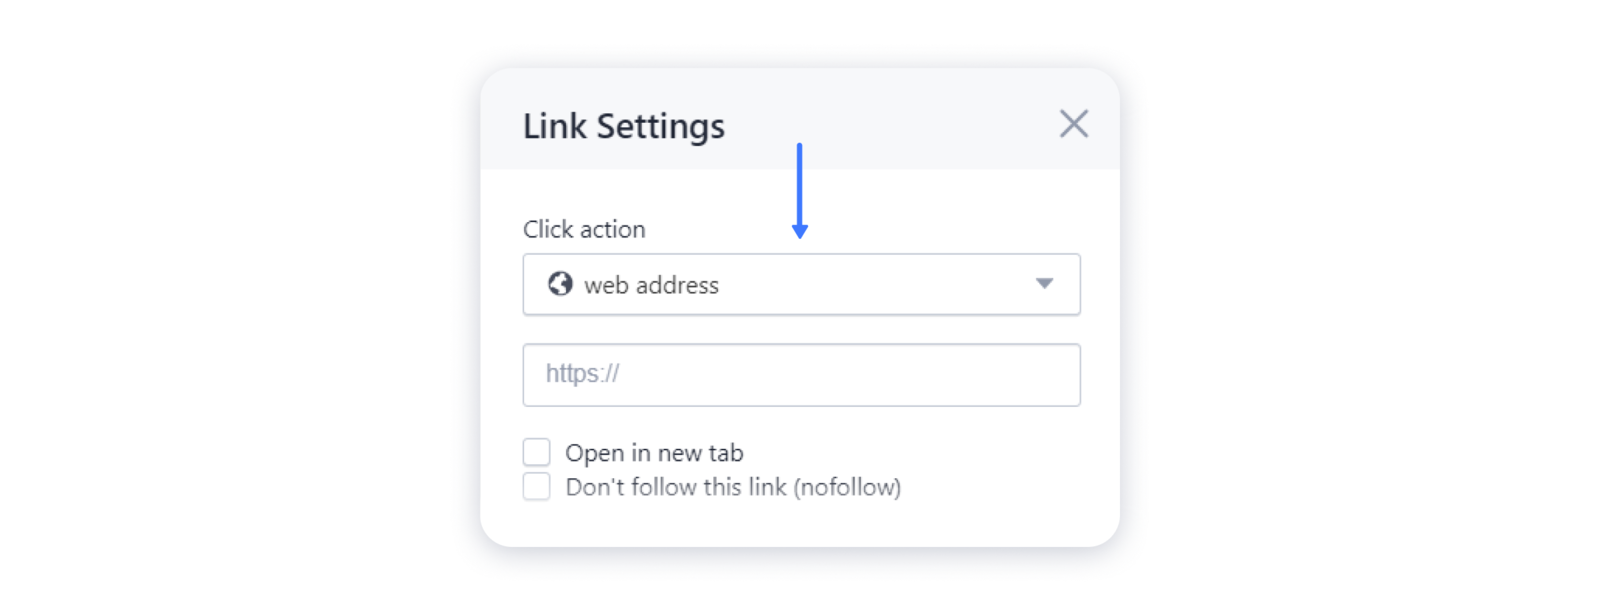
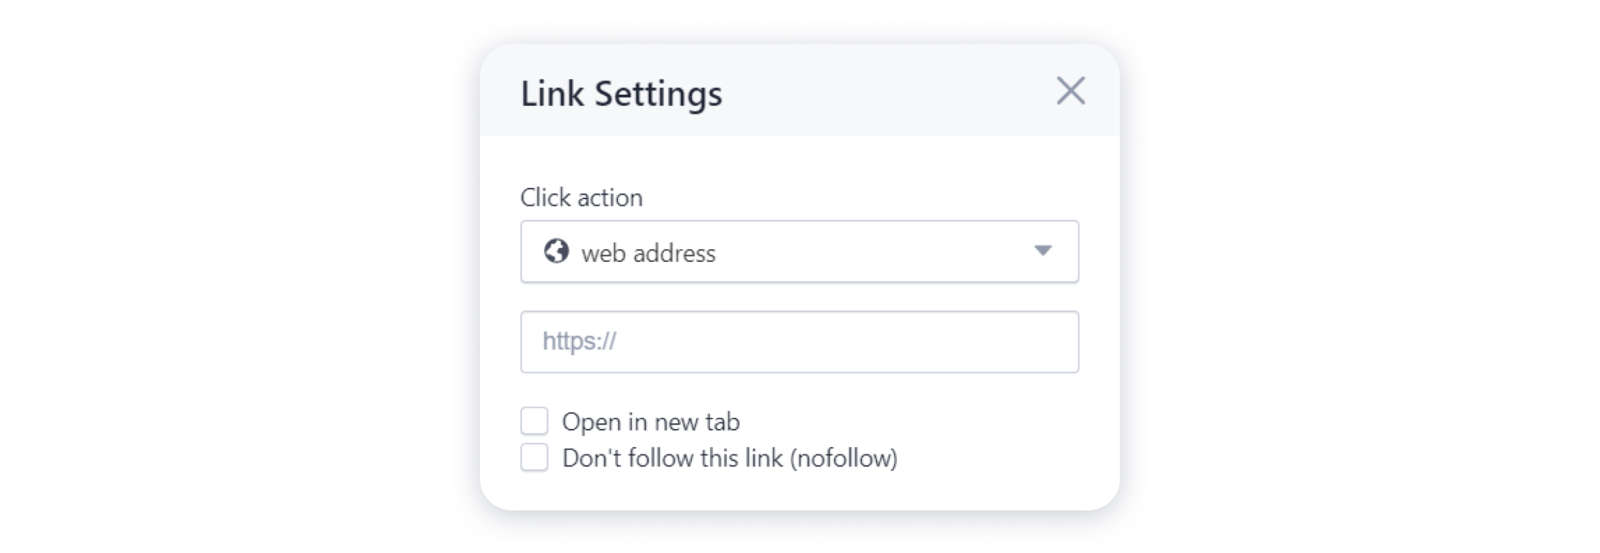
Web address
1- This action redirects your visitors to the external resource. For that, choose Web address in the menu and paste the link with the https:/ extension:
Important: this option is available only for Pro sites.
2- You can also toggle on the options of opening the link in the new browser tab or set the "nofollow" tag for it:
Phone
1- This feature allows you to add a link to the phone number. This is particularly useful for viewing the site on mobiles as it will allow your site visitors to initiate a call with you with just a click. For that, choose Phone option from the menu and the number using the country code:

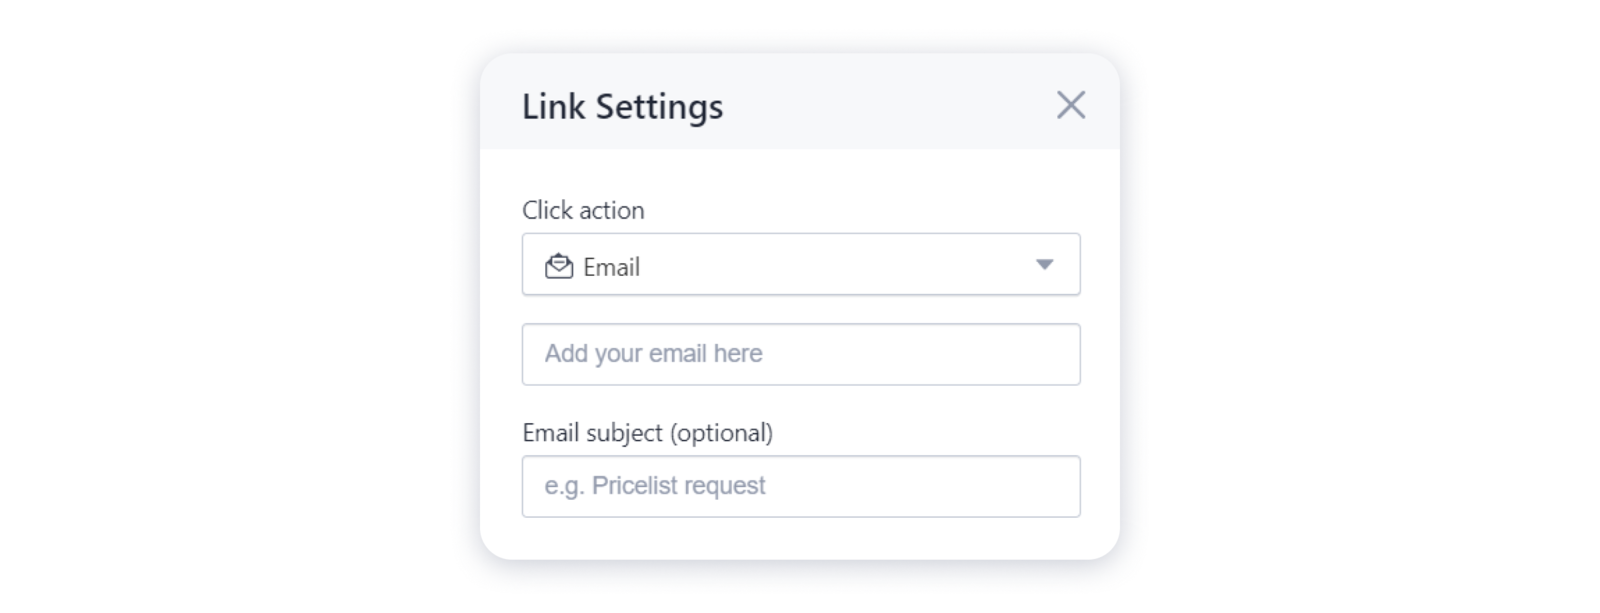
1- This option allows your site visitors to send you an email right from your site (provided that they have a mail service installed). For that, select the Email action, paste your email address and specify the subject that will be displayed in the email (this field is optional):
File download
1- This option provides your users with an opportunity to download a file straight from your site. For that, choose the File download and click Select the file:
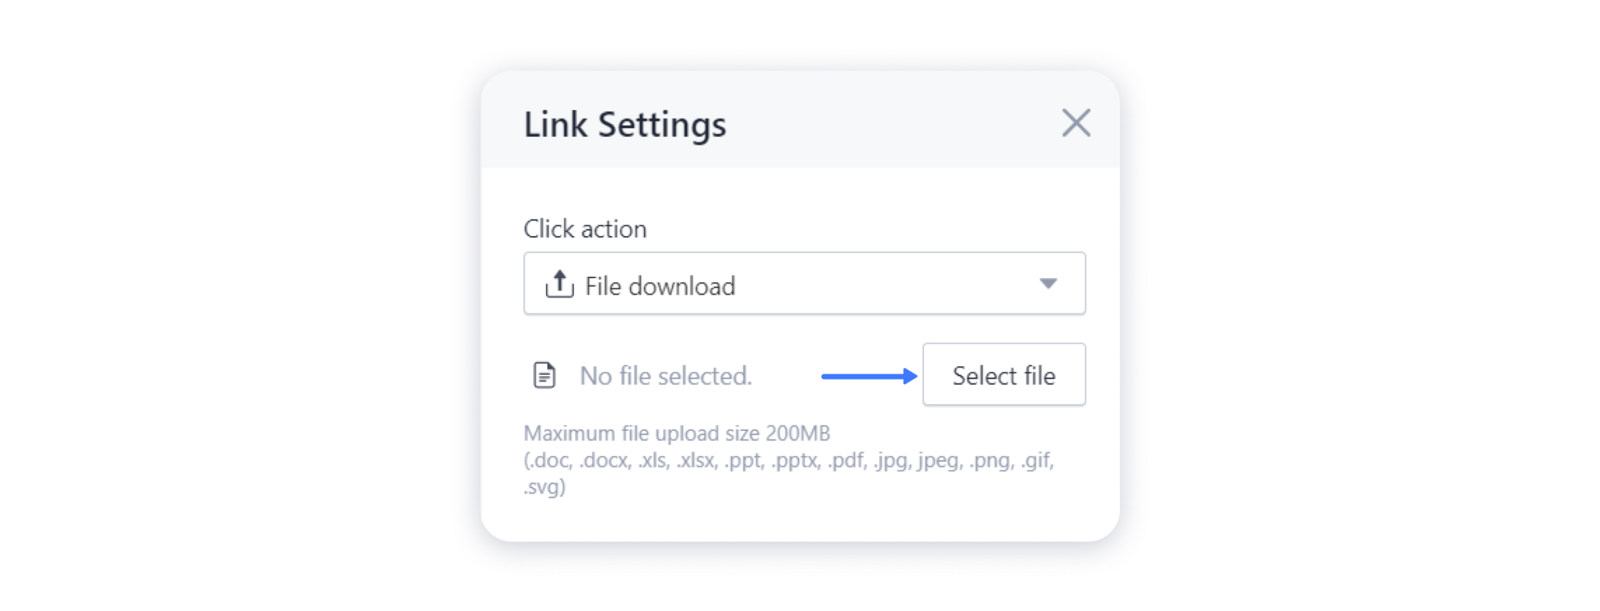
2- In the opened window select the file or upload a new one:

Scale image
1- This option is a specific click action for the images on your site. This way, when the users click on the image, its enlarged version will be opened in the pop-up window. For that, select the Scale image in the drop-down menu in the Media settings:

Important: the Email, Phone, and File download actions don't appear in the settings of adding links to the images.
Don't forget to publish your site for the changes to appear live.