

Drive traffic to your site, keep the site visitors posted on the news, and share personal thoughts with the blog feature. It allows you to create and update content effortlessly while having full control over the blog posts and their appearance.
Follow the instructions below to see how you can create and edit the blog posts on tidma.net.
Important: the blog feature isn't available for sites under the Landing Pro subscription.
Adding a blog
1- To start blogging, open the Settings of your site, navigate to the Blog tab, and click Start blogging:
2- After that, expand the Settings section and set up your author profile — it will be displayed globally on the blog posts that you add. You can instantly preview the image and the name in the right corner:
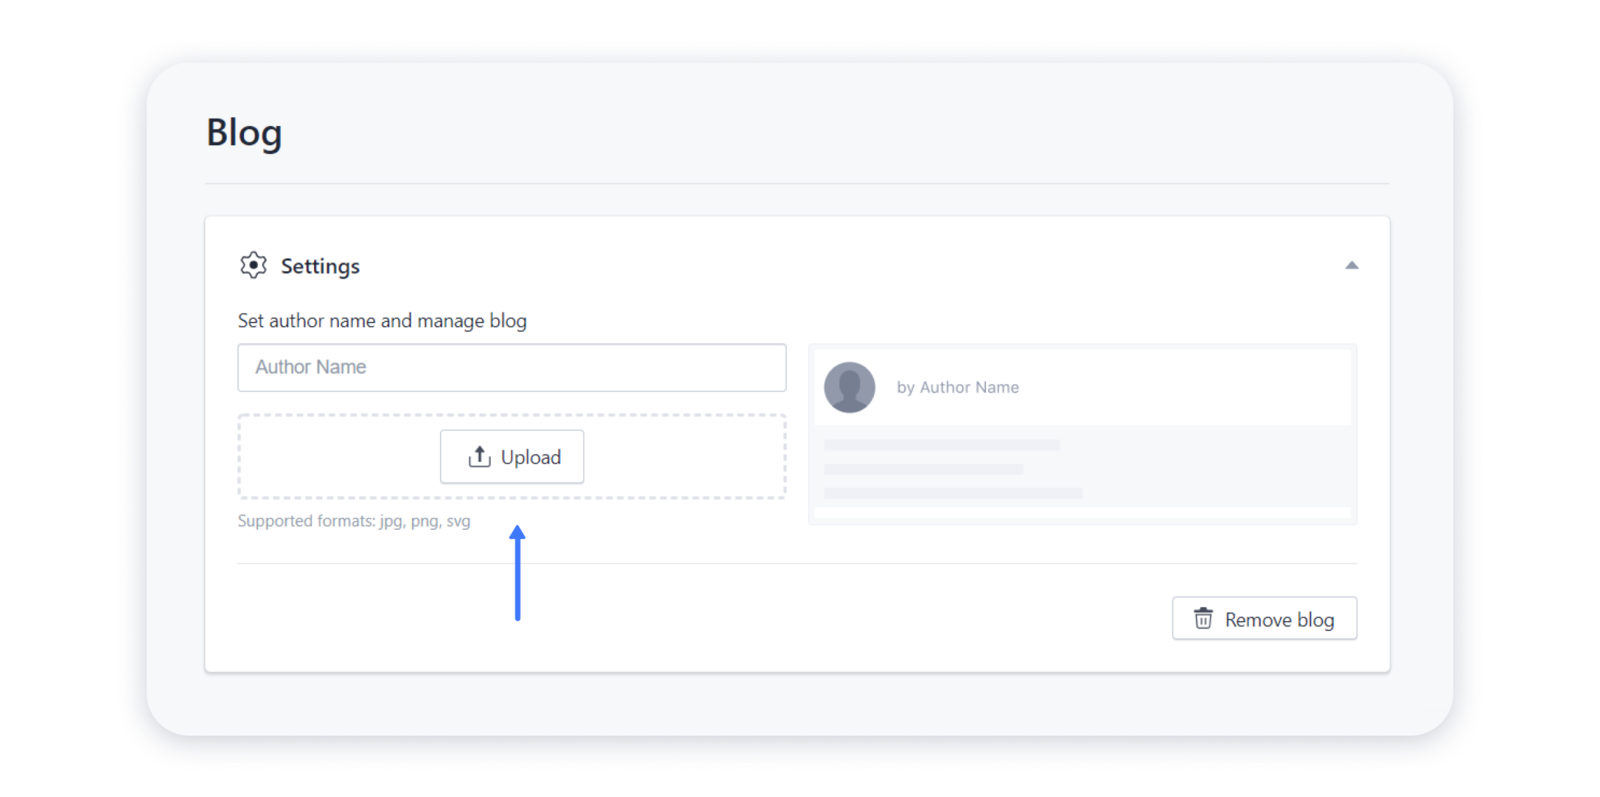
Note: there is no possibility to add different authors for the blog posts yet.
Creating a blog post
1- To begin with, click on the Create post button in the Blog tab:
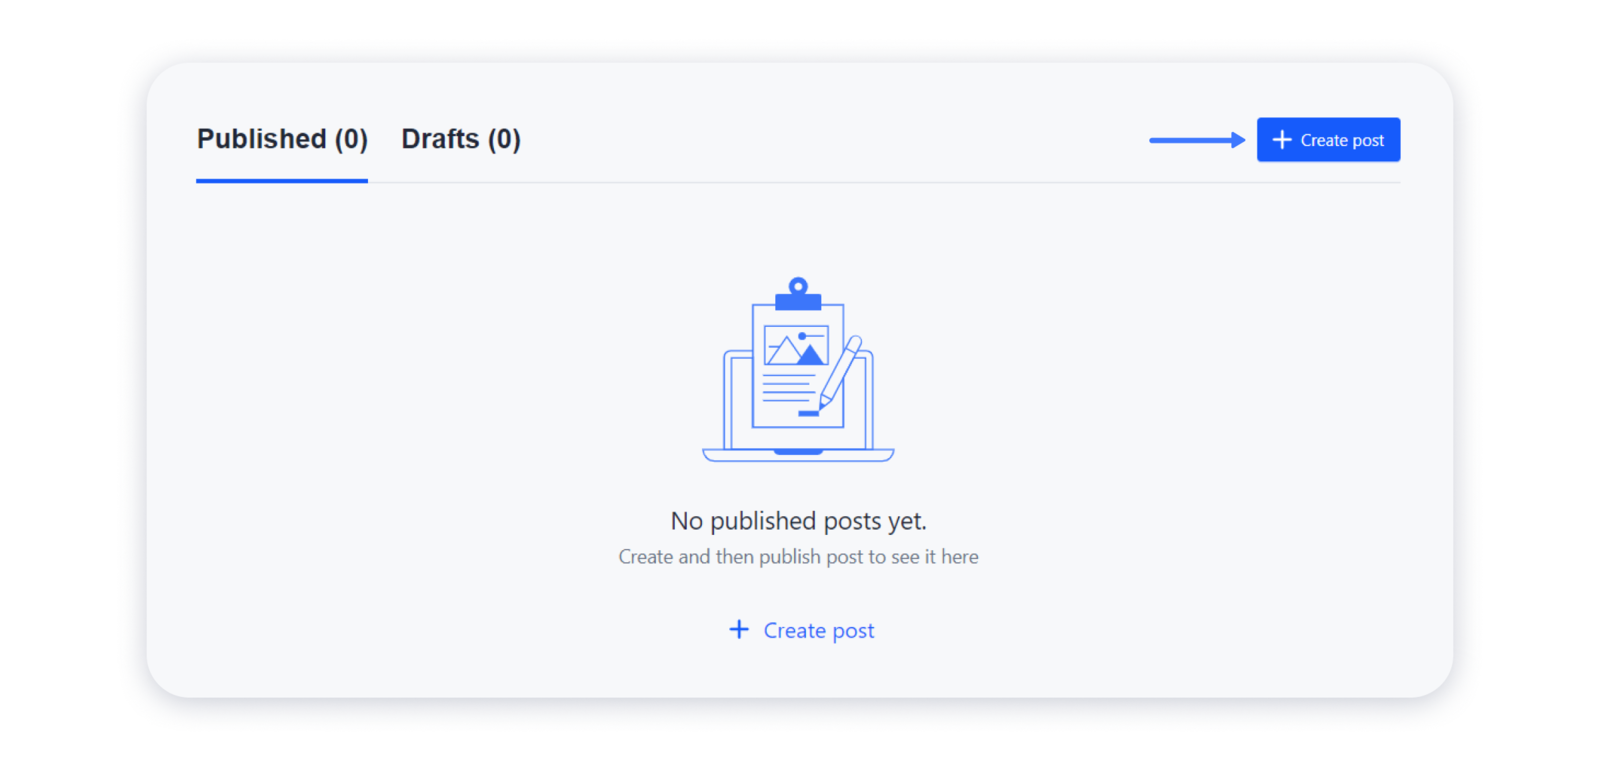
Note: the future post will be automatically saved to the Drafts tab unless you decide to publish it.
2- Switch to the Content tab in the pop-up window and enter the post title and the suitable date:
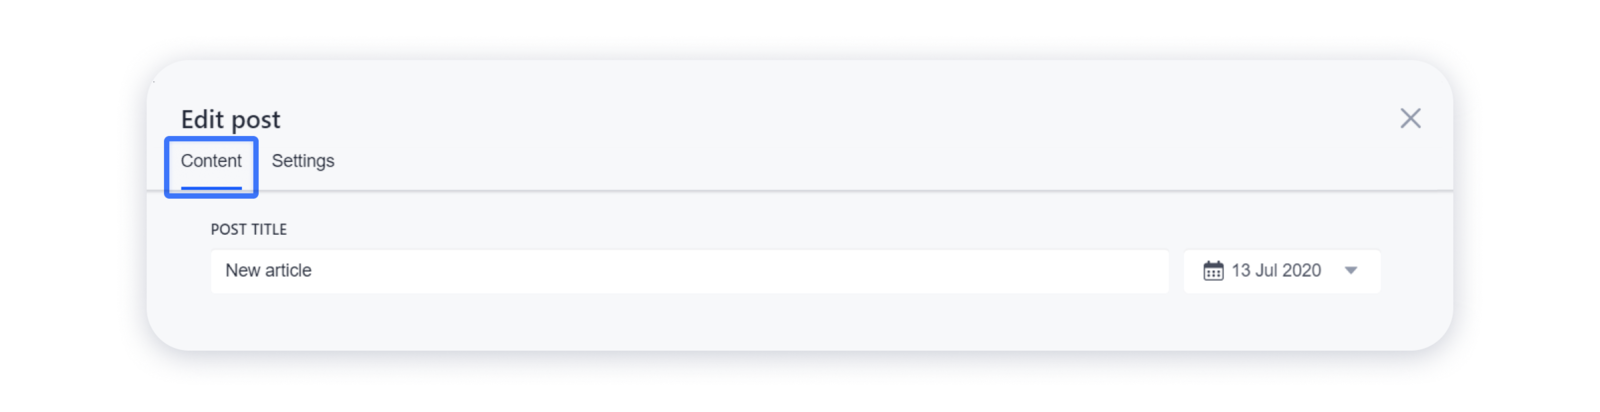
Note: you can't schedule the publishing of the posts in the tidma.net blog.
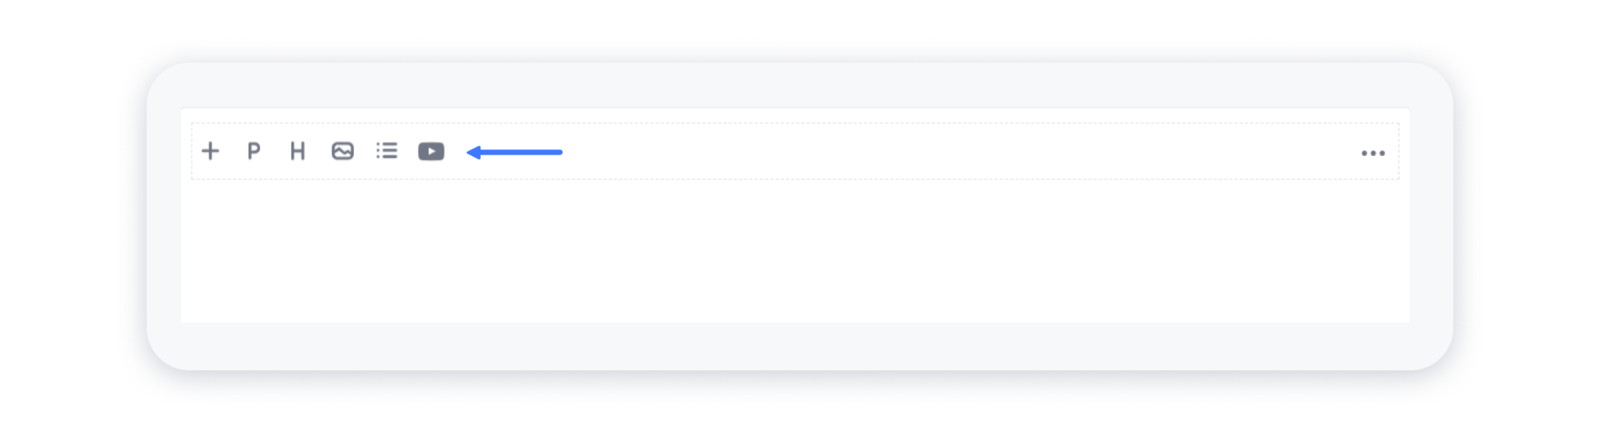
3- Then, click on the blank field below to type the text for your future article. Click on the "plus" icon or press Tab on your keyboard to open the blocks menu:
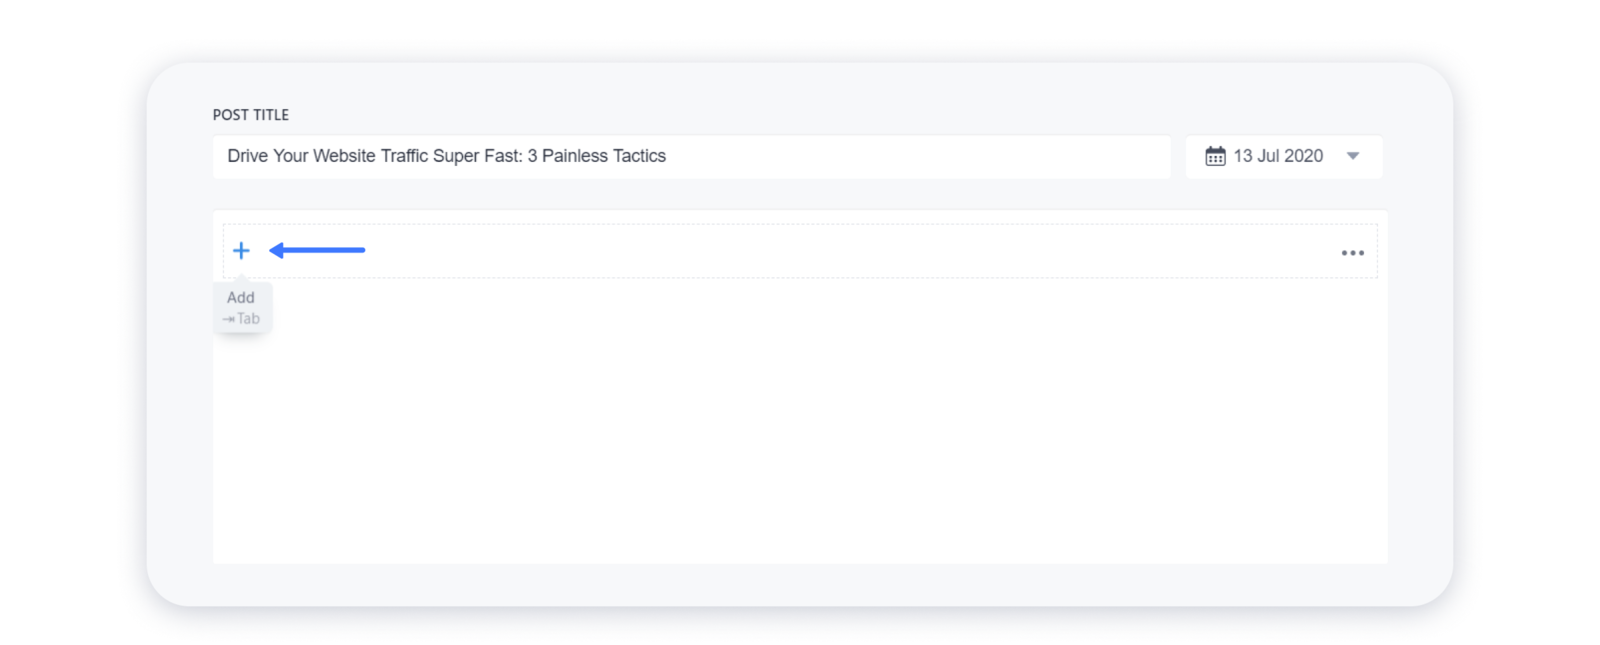
4- Choose the needed type of block in the opened menu — you can add Paragraph, Header, Image, List, or Video:
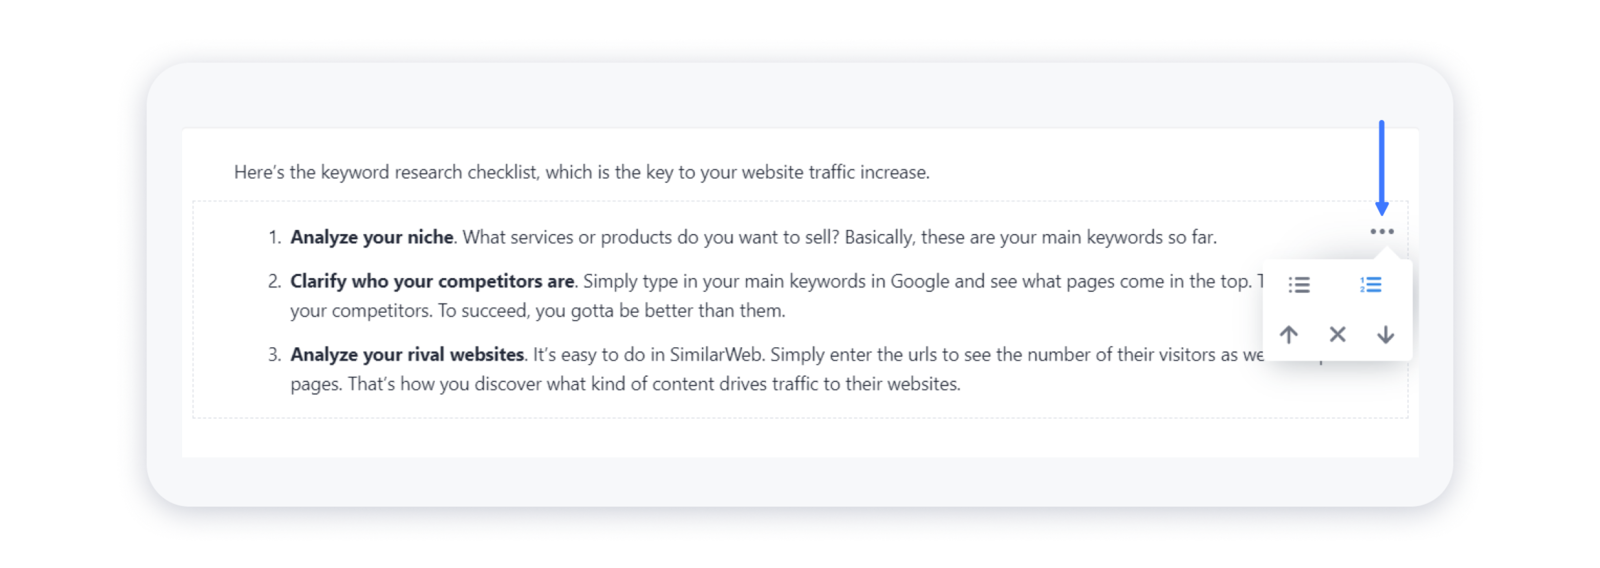
5- You can also manage every block by clicking on the three dots at the right top corner of it:
Thus, you can move the chosen block up or down, or delete it completely from the post.
Editing the content of a blog post
1- You can edit the formatting of the added text by selecting it and choosing the needed option in the pop-up:
2- Besides, you can add a link to the selected text and enable the "nofollow" attribute for it:
3-Once you've added the list to your blog, you can decide whether you want to convert the numbered list to a bullet one:
4- After uploading the images or videos, make sure to describe it in the Caption field below:

Important: the supported links to insert the videos in your posts are those from YouTube only. If you have a video elsewhere, make sure to upload it to YouTube to generate a link.
Launching the post
1- Once you are done with an article, click on the three dots at the bottom of the pop-up and choose Save changes:
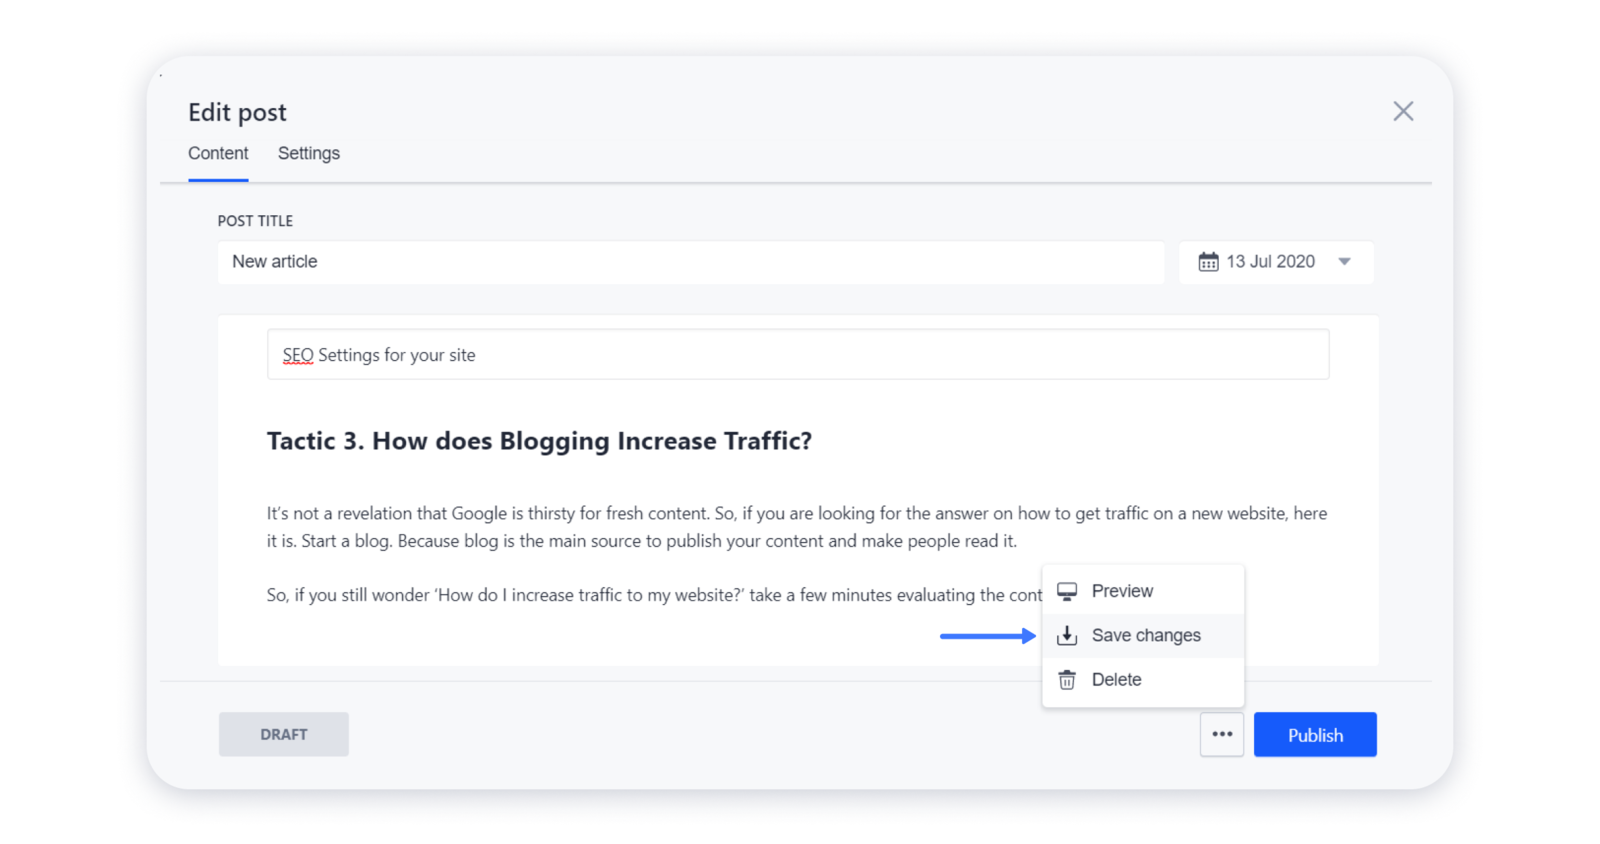
2- If you want to see how the post will look on the published site, click Preview in the opened menu:

3- If you are ready to launch the post on your live site, choose the Publish option:
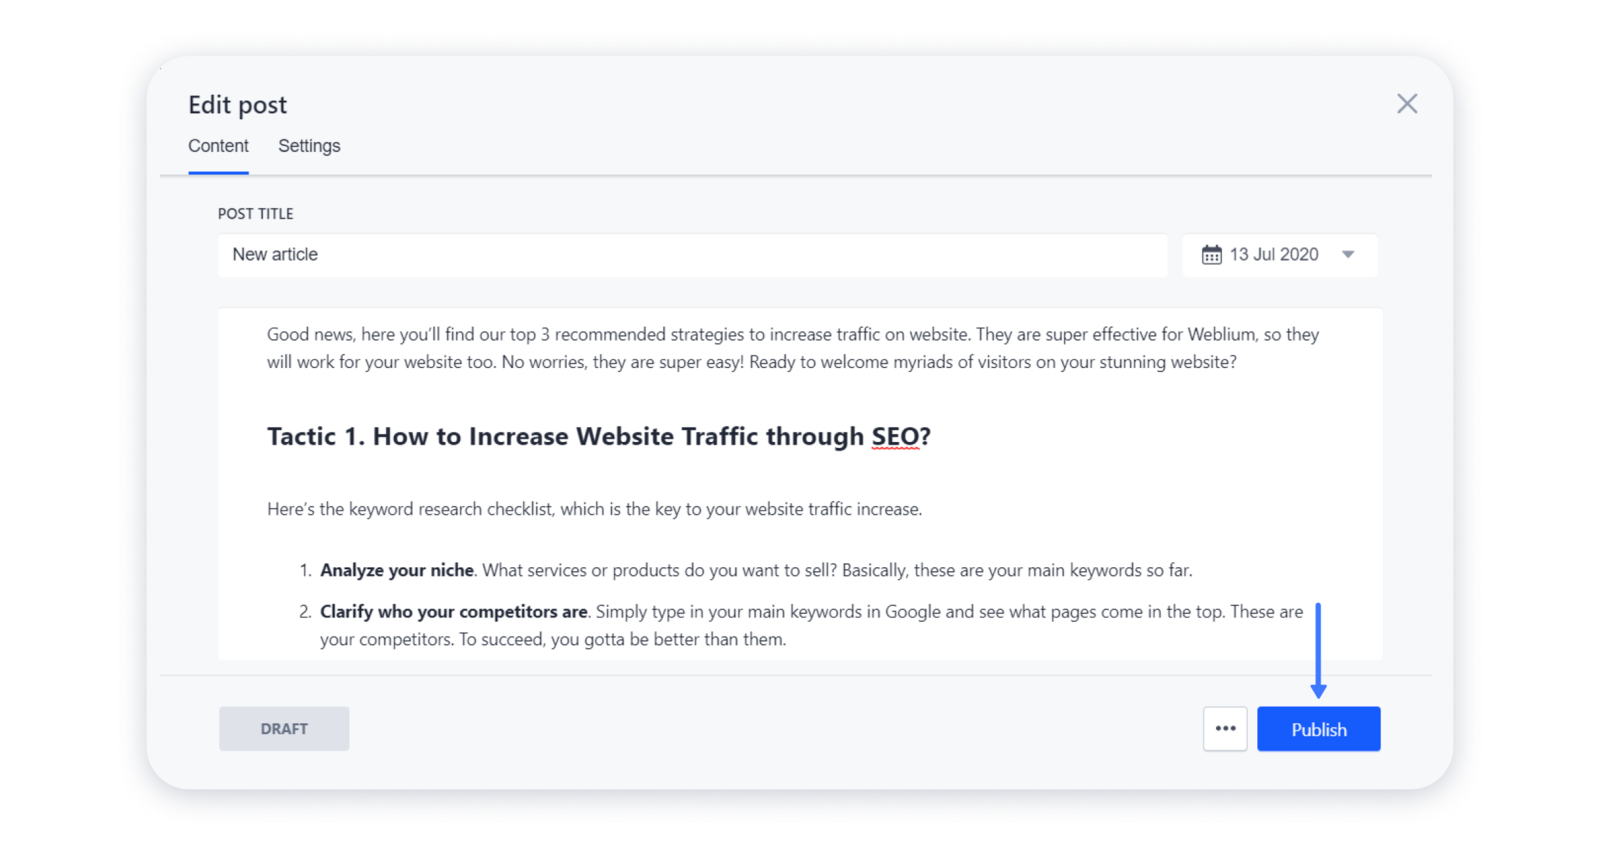
Note: the post will be automatically transferred to the Published tab of your Blog and become visible in the blog feed on your site.
Don't forget to change the SEO settings for the posts — upload the preview, change the URL, etc. Also, customize your blog feed on the site according to the instructions in the article Displaying blog on the live site.