

To stick to the overall design of your site, we recommend changing the type and the layout of the buttons in the settings.
Follow the instructions below to change the design of a button.
Step 1. Changing the design of a button in the global settings
1- For that, click on the three dots in the toolbar in the editor and go to the Site Style tab:
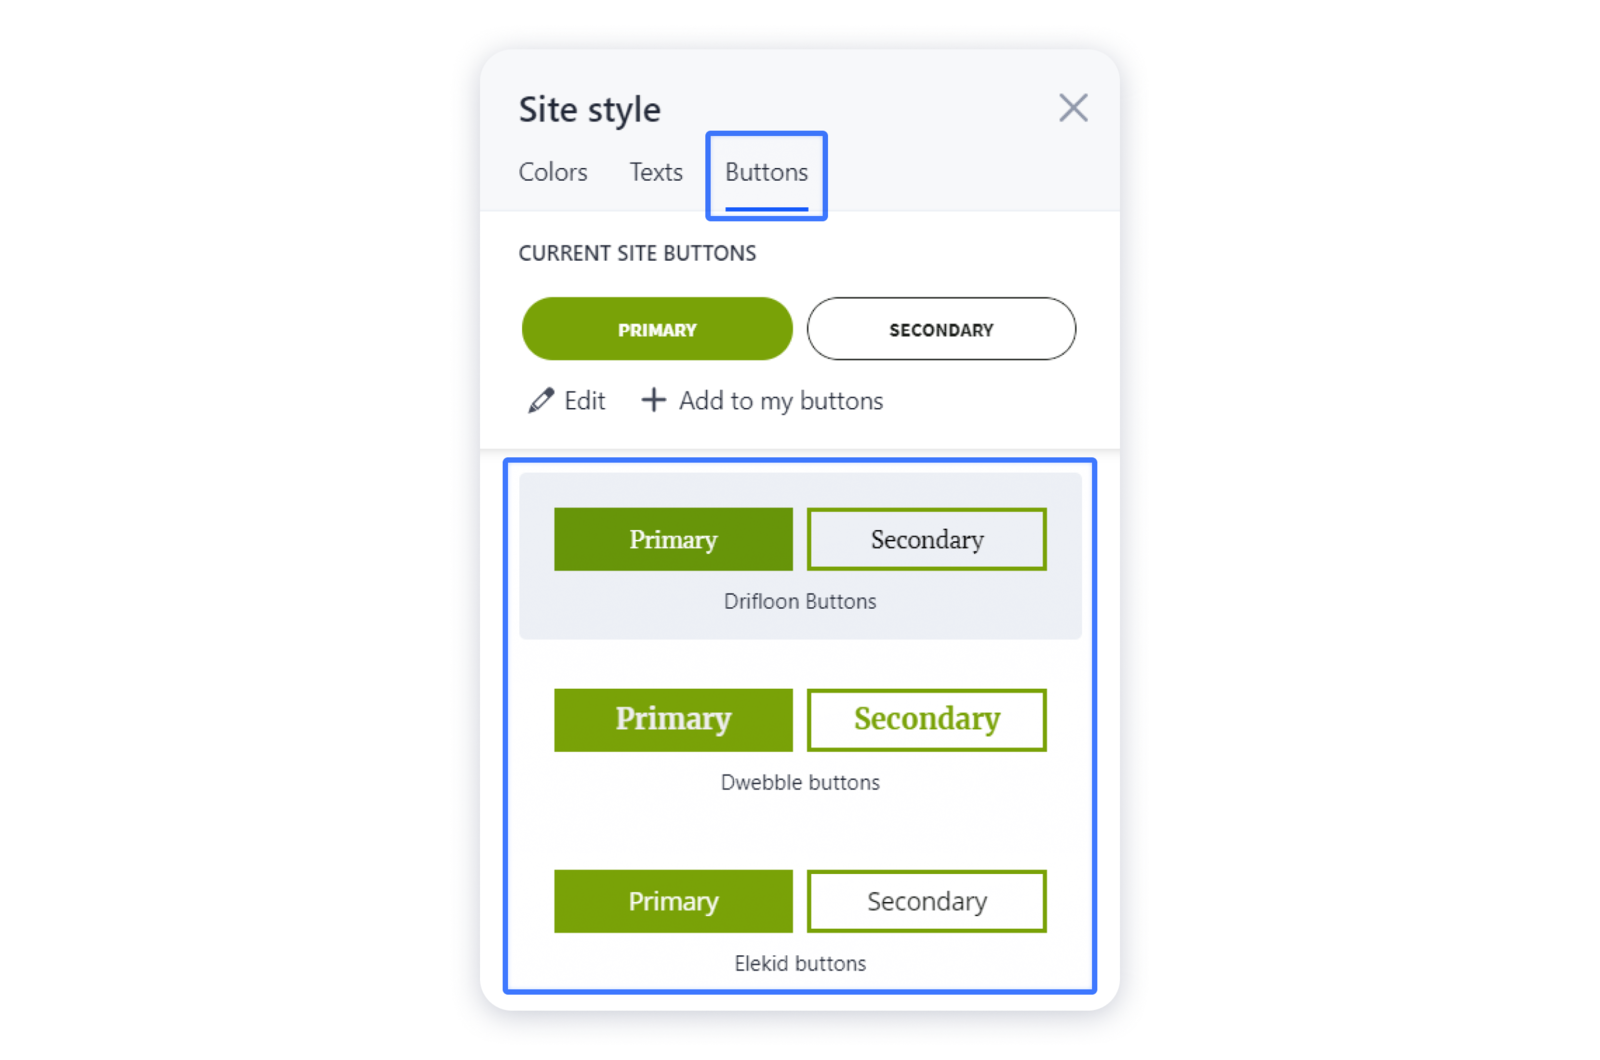
2- Navigate to the Buttons tab and select one of the ready-made options in the gallery:
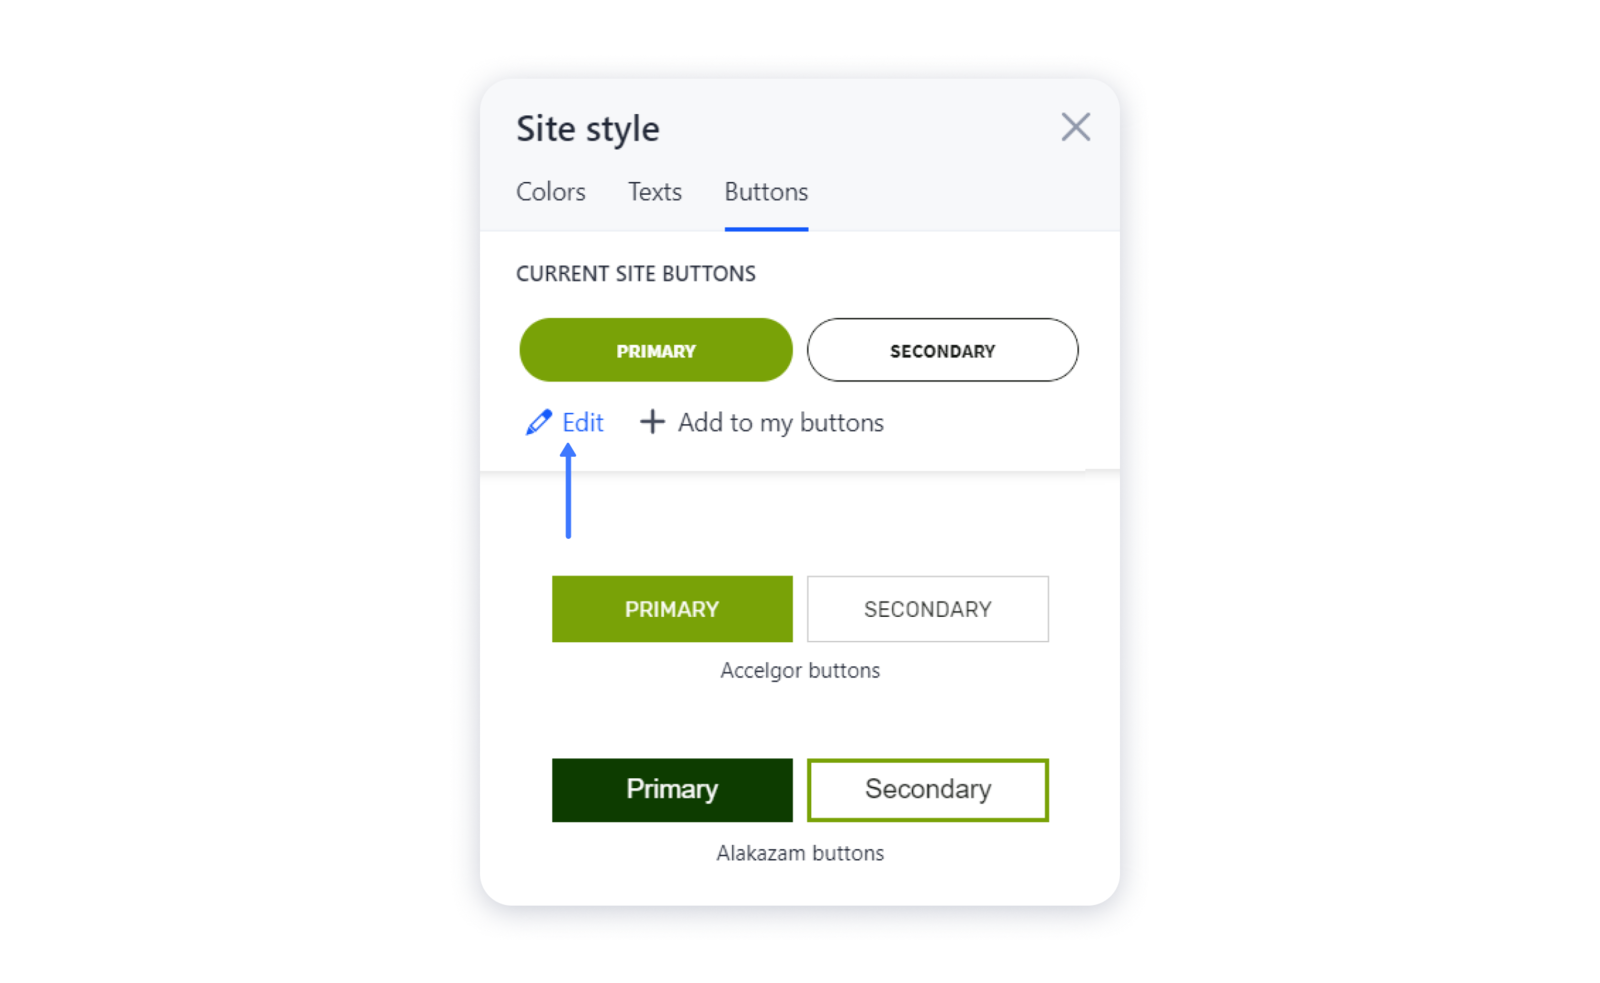
3- If you want to customize the layout of the button yourself, hover over the current button style and click Edit:
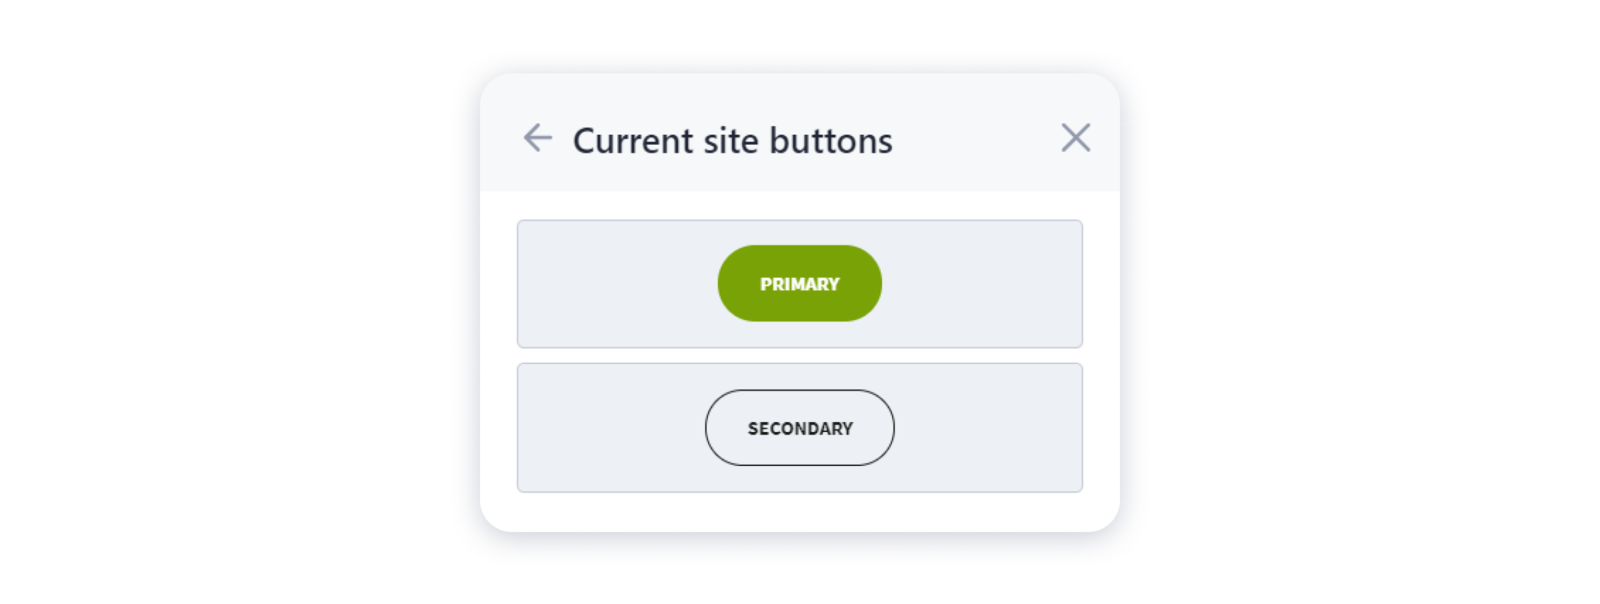
4- In the new window, select the Primary or Secondary button type and click on the one you need to edit:
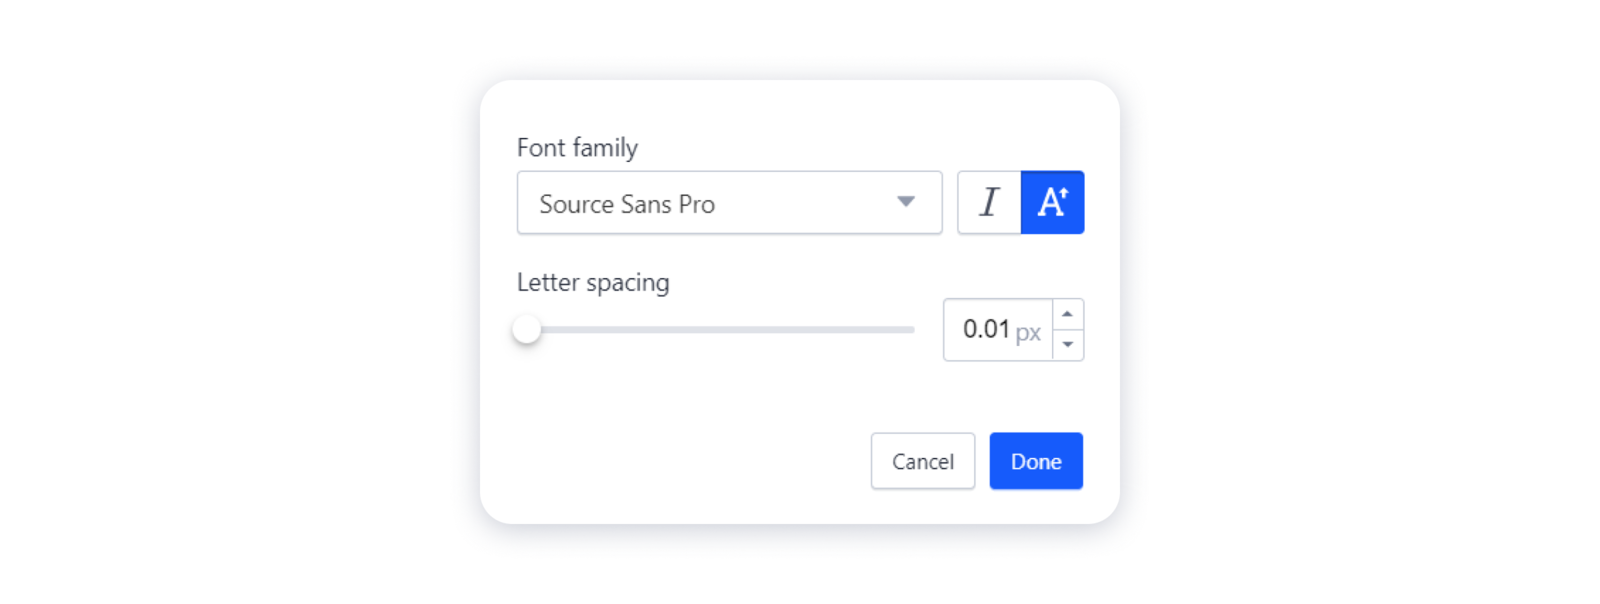
Tip: here you can also change the font and formatting used for the text in the buttons:
5- After choosing the button type in the new window, you can change the color of the fill, text and borders of the button:

Important: don't forget to separately customize the button design for a dark background:

6- After finalizing the design, click Done.
Step 2. Changing the style of the particular button
1- To change the design for a specific button on the site, click on it and click on the "gear" to access its settings:

2- Open the Style tab in a new window and select the needed type (Primary, Secondary, or Link), style, and size of the button:
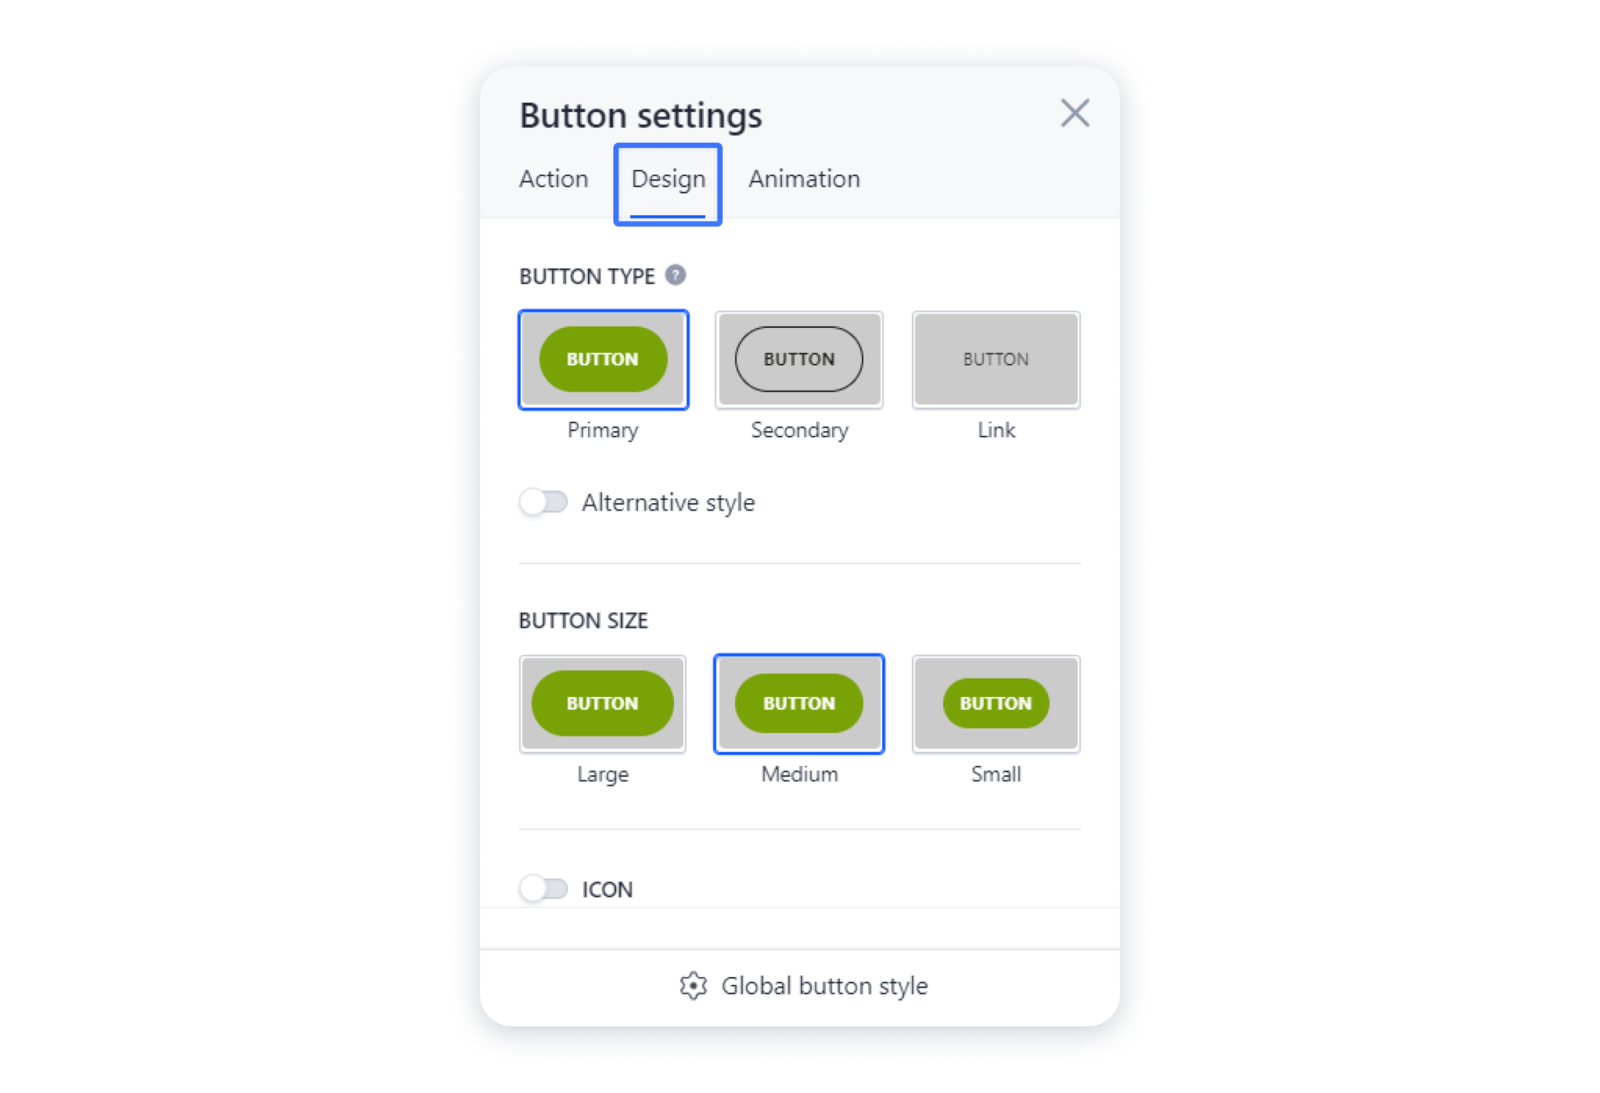
Tip: choose the "Primary" button for a major call-to-action like "Sign up", etc. Use "Secondary" type of a button for a minor call-to-action, e.g., "View portfolio". Use "Link" buttons to show additional info — for instance, "Learn more".
3- In addition, you can add an icon to the button, and also change its alignment:
4- Don't forget to publish your site for the changes to appear live.