Once you've added new elements to your blocks, you can further access their settings to duplicate, delete, or edit them. Each item has its own settings, but there are basic actions that can be applied universally. Also, if you're planning to add several elements to the block — for example, image, text, and buttons — it will be more convenient for you to place them in separate columns. This way, you can adjust the position of each element or change the size of its placeholder.
Follow the instructions below to learn how you can manage your elements or columns in the block.
Managing elements
1- Firstly, hover over the element and click on the three dots in the top right corner to delete or duplicate it: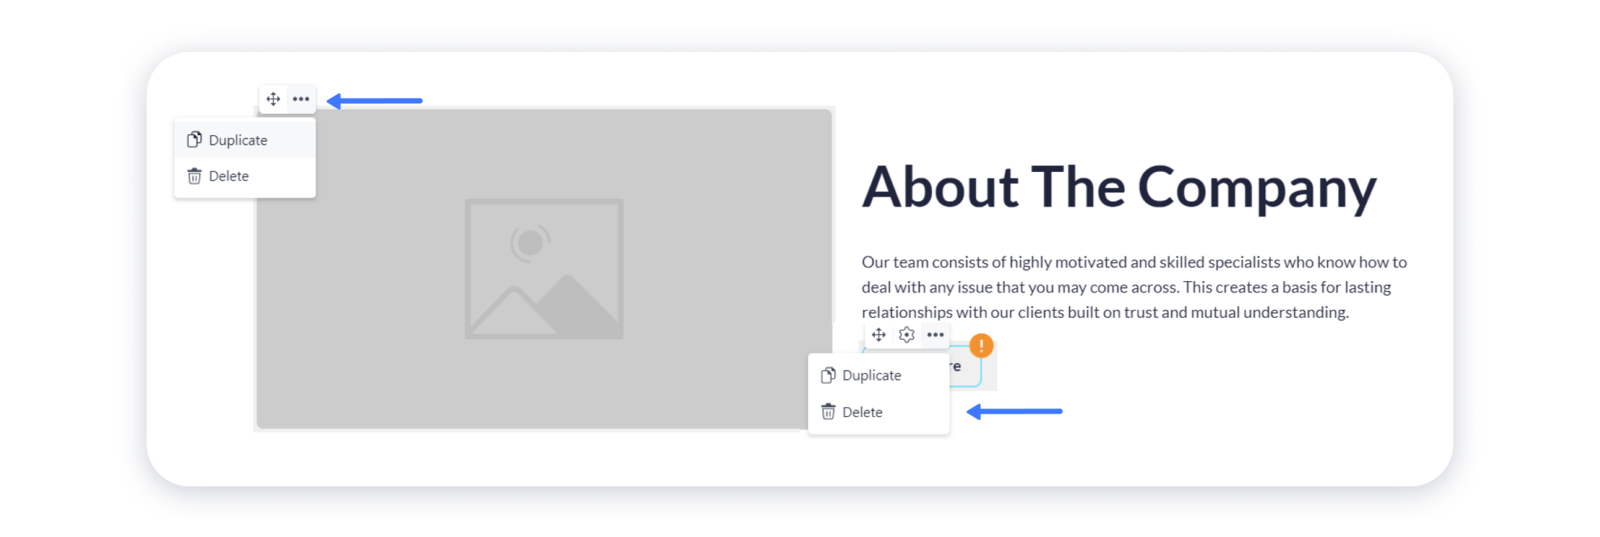 2- Drag the element to a desired position by clicking on the direction arrows icon in the top right corner of it:
 Note: you can move the elements only within the particular block they are added to.
Managing columns
Columns are a great way to organize your elements within the block and make each of them an independent item that can be easily adjustable.
Adding columns to a block
1- For that, hover over the particular column and add a new one by clicking on the "plus" sign near it: 2- You can adjust the width of the columns using the dividers that are placed next to them. To do this, hover over the empty space between the columns, click on the divider and drag it to the needed direction:
 3- You can also delete or duplicate each column by clicking on the three dots in the top right corner:
Changing the layout of the column
1- To access the settings of the column, hover over it and click on the "gear" in the top right corner: 2- In the Layout tab you can change the gap between the columns in the block, the alignment of the elements in this column, set the paddings between the edges of the column and the element in it, or change its style — whether the rounded corners will be applied to the column:
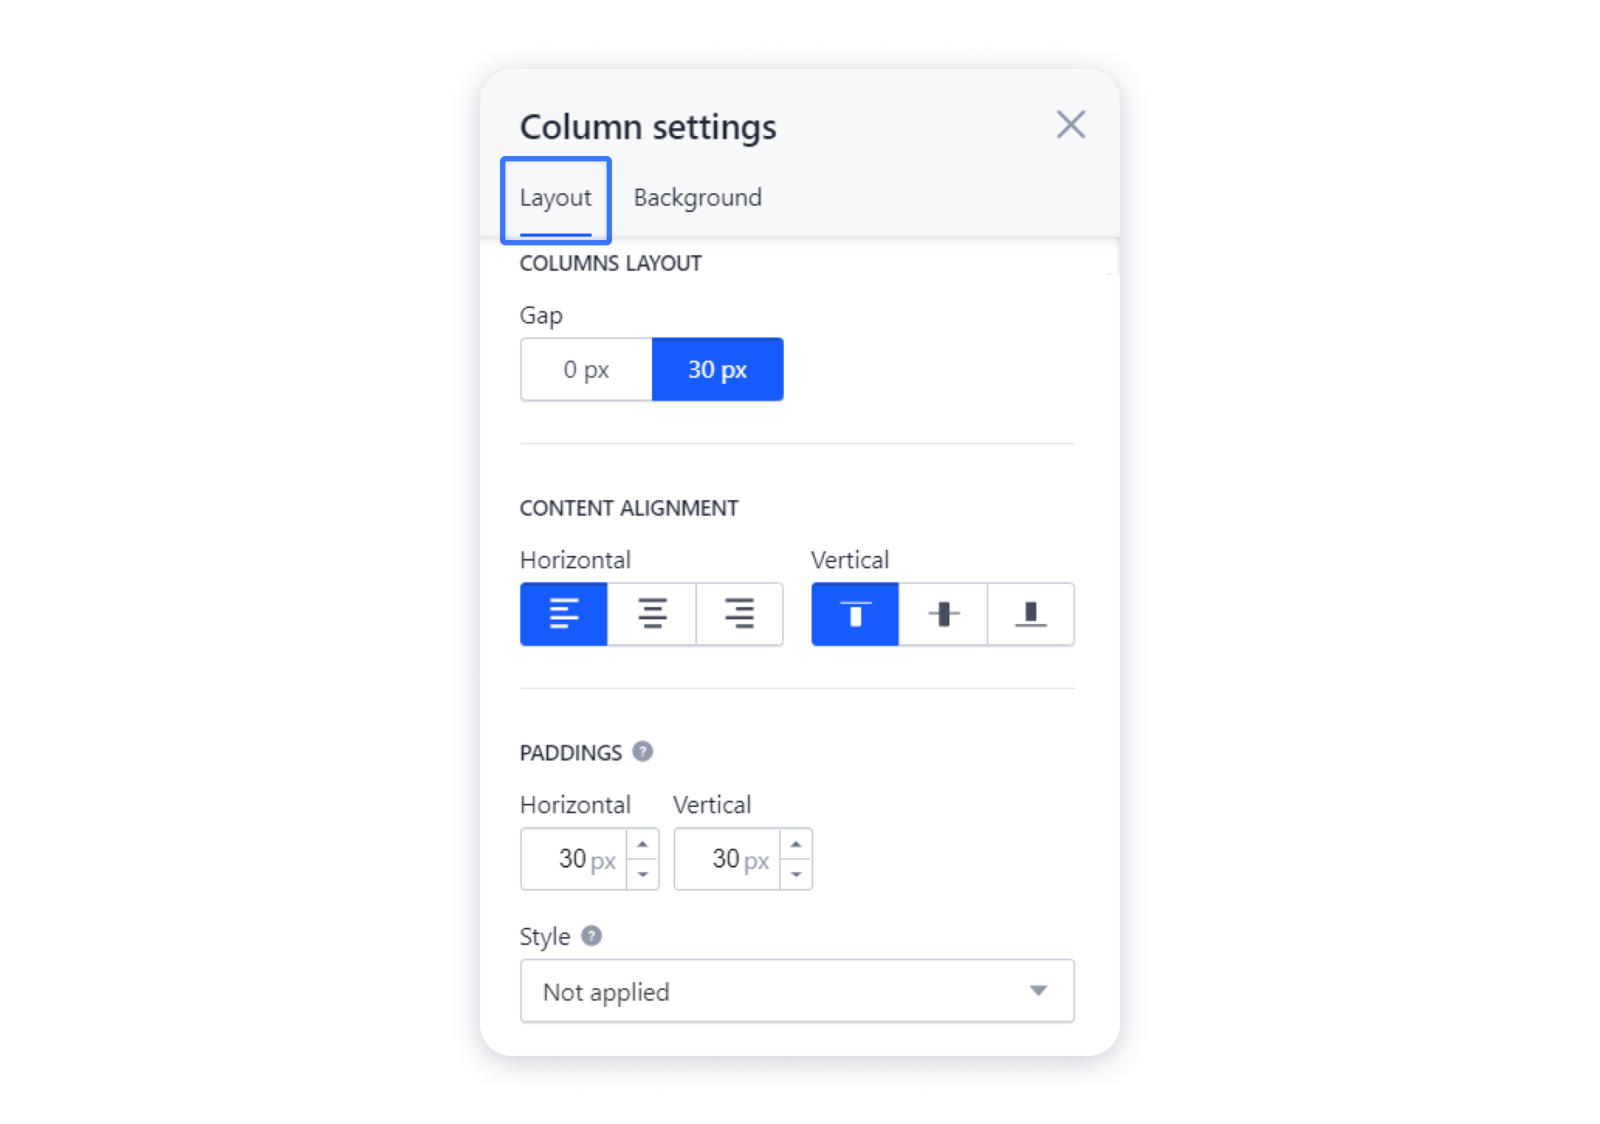 Important: the paddings or style parameters can be applied only if the background is active.
Changing the background of the column
1- To access the settings of the column, hover over it and click on the "gear" in the top right corner: -
-
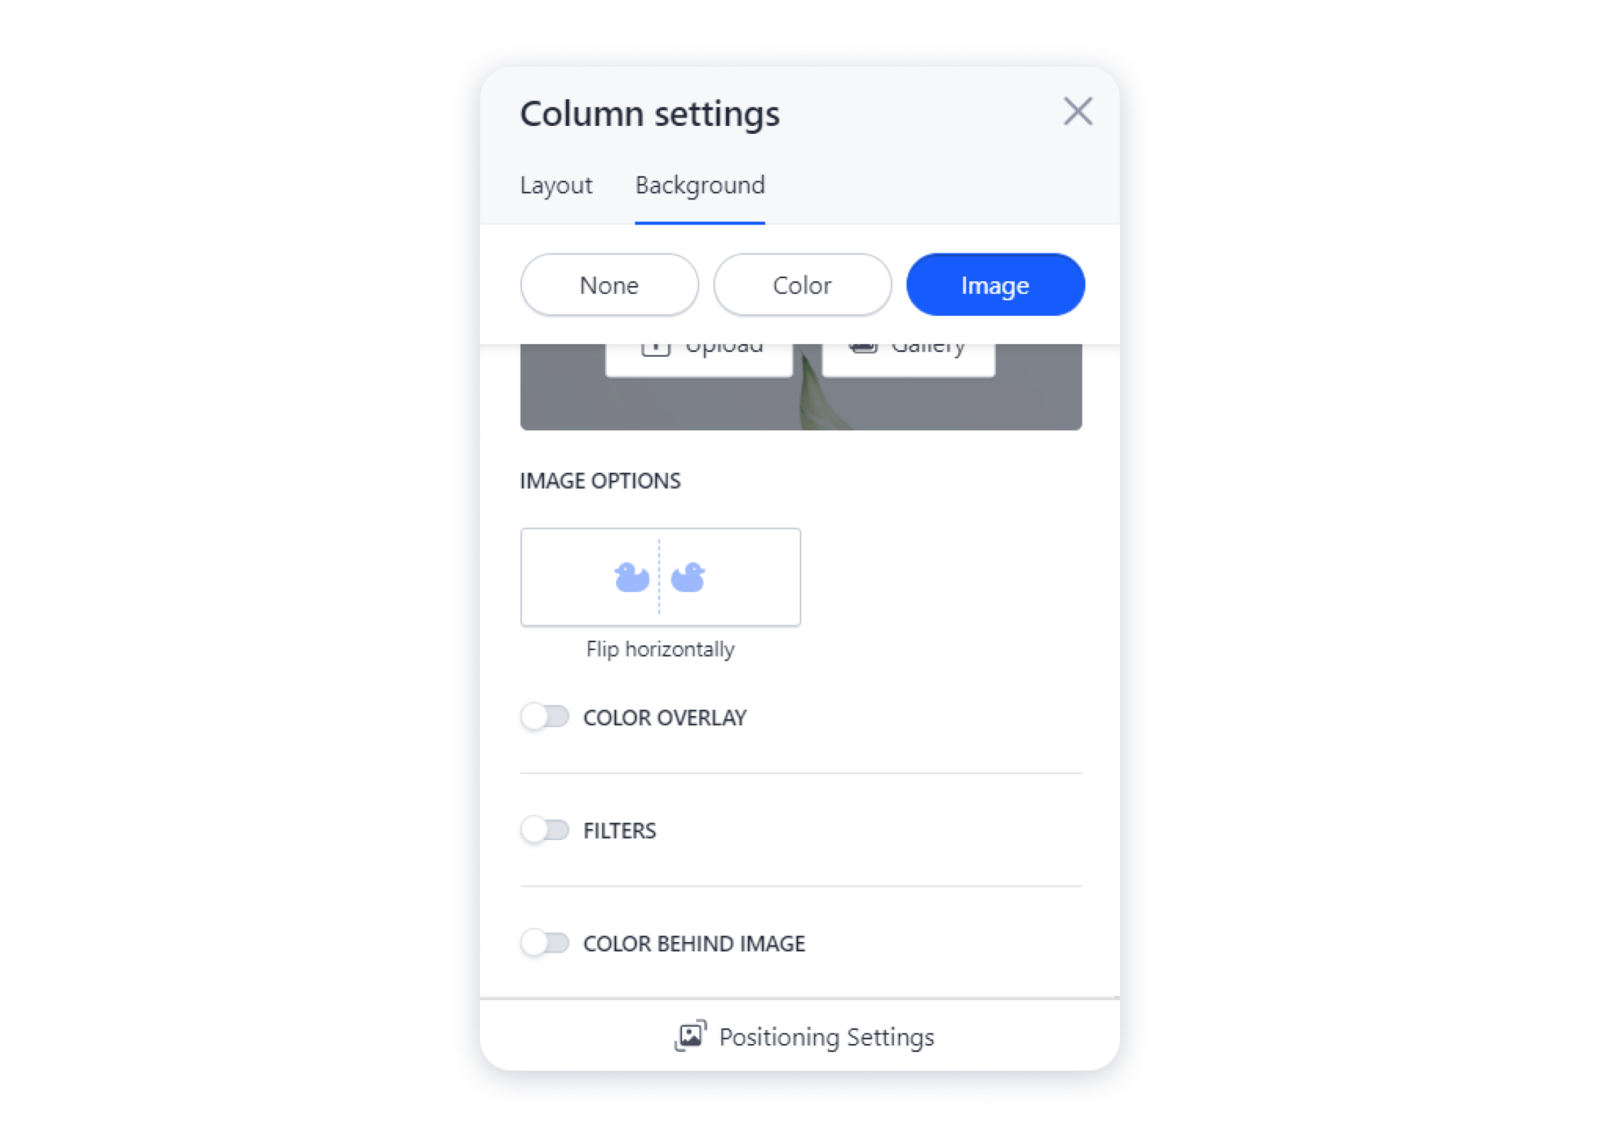
2- Navigate to the Background tab in the settings and add color or image background to the column: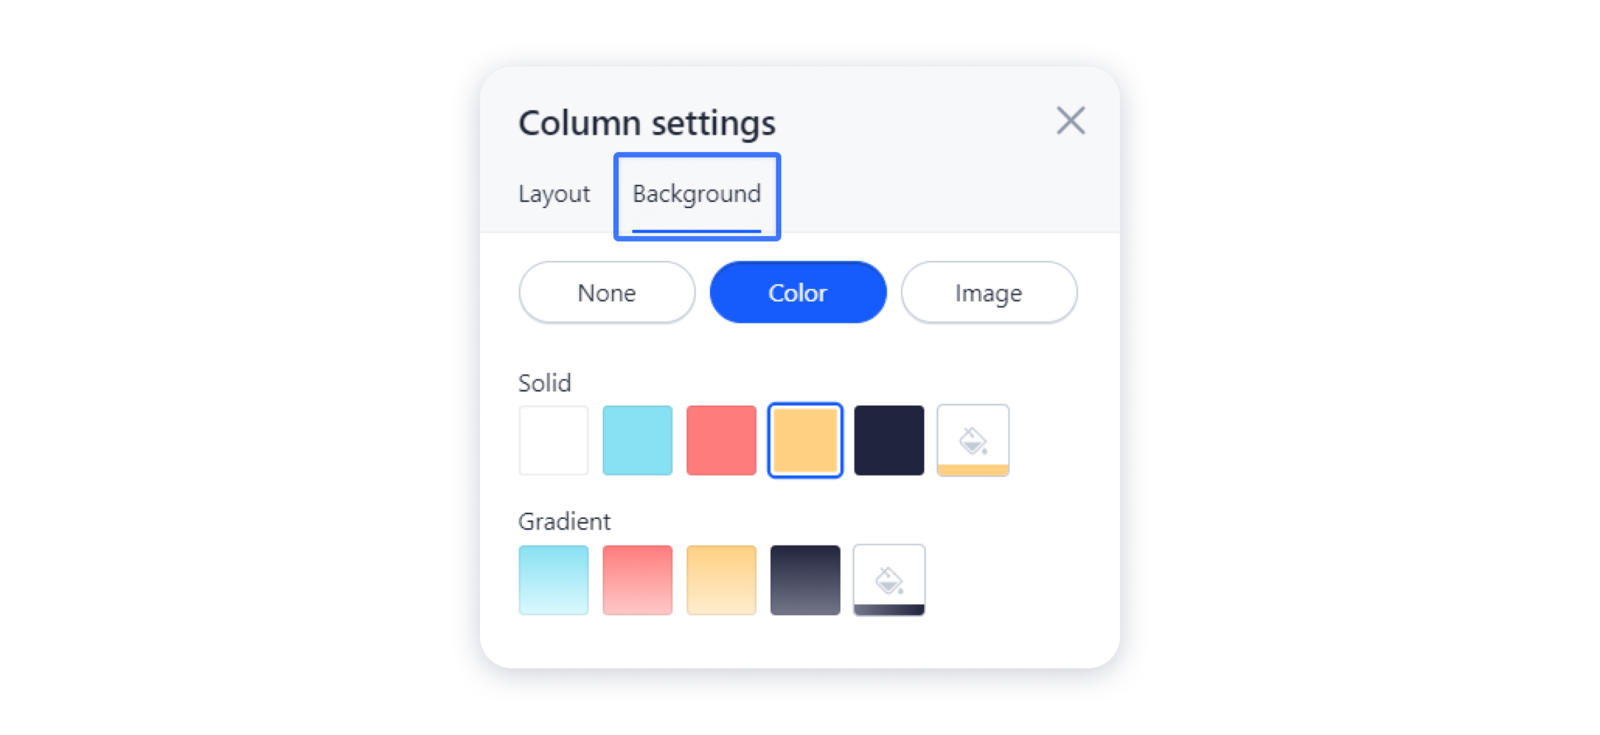 3- When you set a photo as a background of the column, you will see more customization options — e.g., applying filter or color correction: